Installing DragGAN AI on Windows may seem daunting, but with the right instructions, you’ll have it up and running in no time.
In this article, we’ll guide you through the installation process, covering the required software and the steps to download and install DragGAN AI.
Part 1: Required Software
Before we can proceed with the installation, there are a few software packages we need to have on our system: Python, Git, and Nvidia CUDA.
1. Install Python
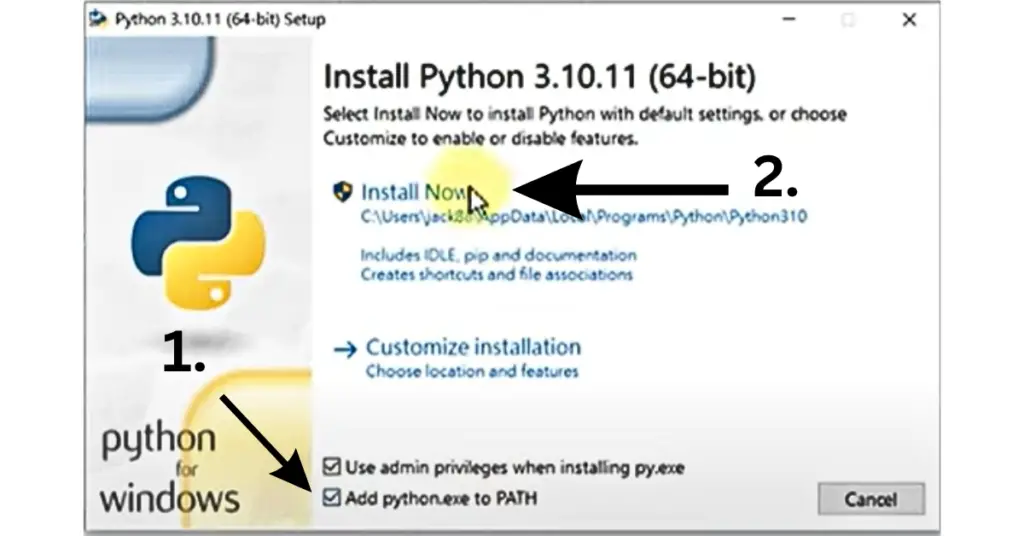
To begin, we need to install the latest version of Python. Follow these steps:
- Visit the official Python website and download the latest version.

- Once the download is complete, execute the installation file.
How to check if Python is installed or not?
- To check if Python is installed correctly, press the Windows key and the “R” key on your keyboard simultaneously.
- In the Run dialog box, type “cmd” and hit Enter to open the command prompt.
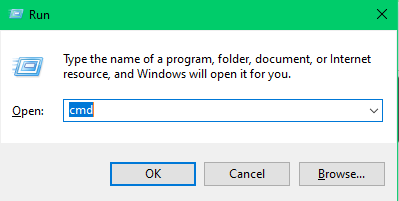
- Type “python –version” and press Enter. If you see a version number displayed, Python is installed correctly.
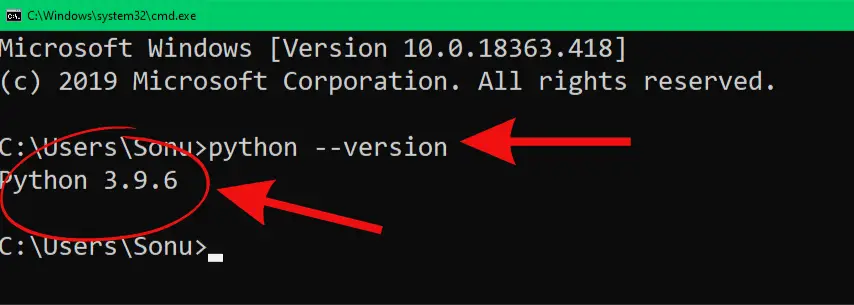
If you encounter an error message, ensure that the option you just installed is checked. Restart your computer and try again to verify the installation.
2. Install Git
Next, we need to install Git. Follow these steps:
- Go to the Git website and download the 64-bit version.
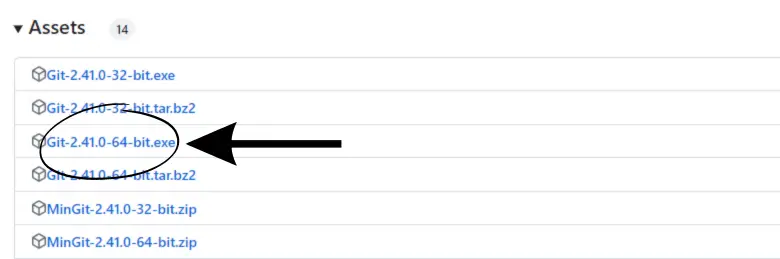
- Once the download is complete, open the downloaded file and click the “Execute” button.

- Proceed with the installation, and when prompted to overwrite any existing installations, deselect that option and continue with the installation.
- Finish the installation process.
How to check if Git is installed or not?
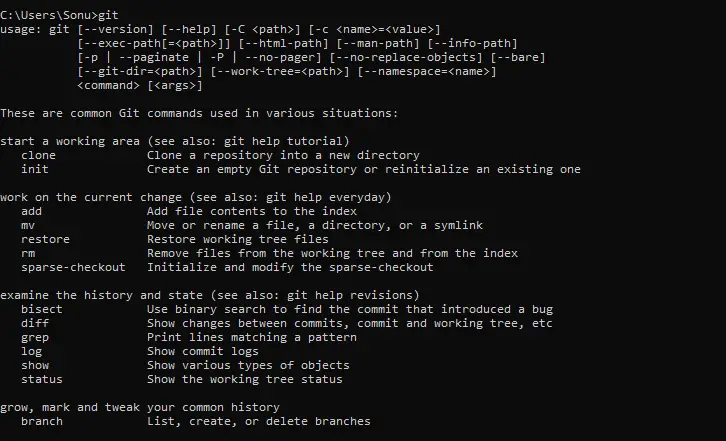
To check if Git is installed correctly, press the Windows key and “R” key simultaneously, type “cmd,” and hit Enter.
In the command prompt, enter “git” and press Enter. If you see a screen with Git-related information, it means Git is installed successfully.
If you encounter any issues, try restarting your computer and checking again.
3. Install Nvidia CUDA
Now, we need to install Nvidia CUDA. Please note that DragGAN is currently compatible with CUDA 11.8. If you have a different version installed, you’ll need to remove it before proceeding.
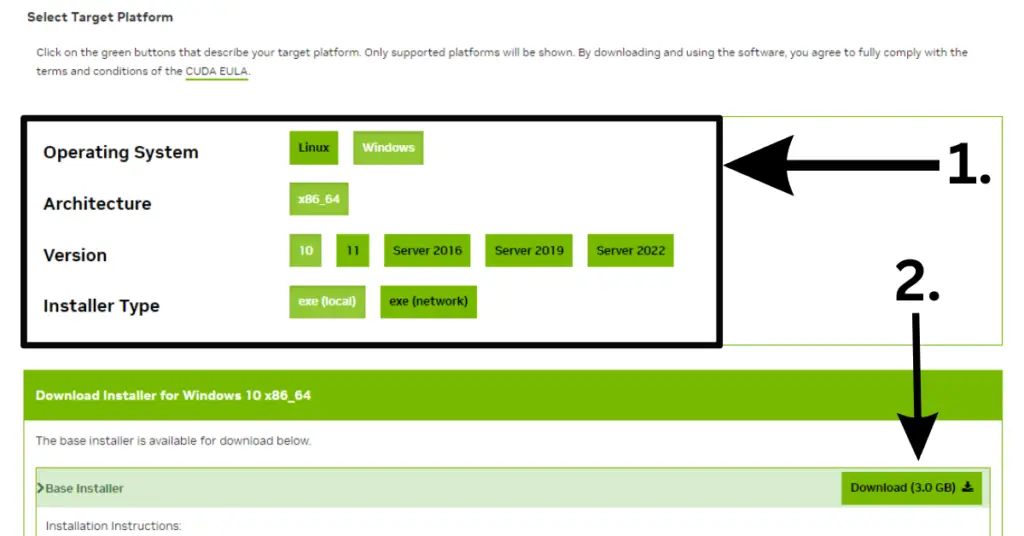
- Visit the Nvidia developer website and download the CUDA 11.8 toolkit.
- Select the appropriate version for your Windows system (e.g., Windows 10).
- Scroll down the page and download the CUDA toolkit installation program.
- Save the installation program to a location of your choice.
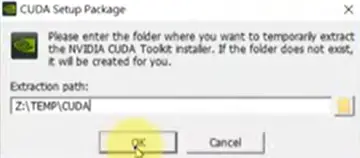
Once the download is complete, open the CUDA installation program.
Accept the terms and conditions and click “Customize” to access advanced options. In the customization menu, select only the CUDA option and uncheck all other options.
Click “Next” to begin the installation.
To verify if CUDA is installed correctly, open the console application and check for the presence of CUDA programs. Please note that some computers may require a restart after installation.
Part 2: Downloading and Installing DragGAN
Now that we have the necessary software installed, let’s proceed with downloading and installing DragGAN.
1. DragGAN Download
- Click the DragGAN installation URL provided.
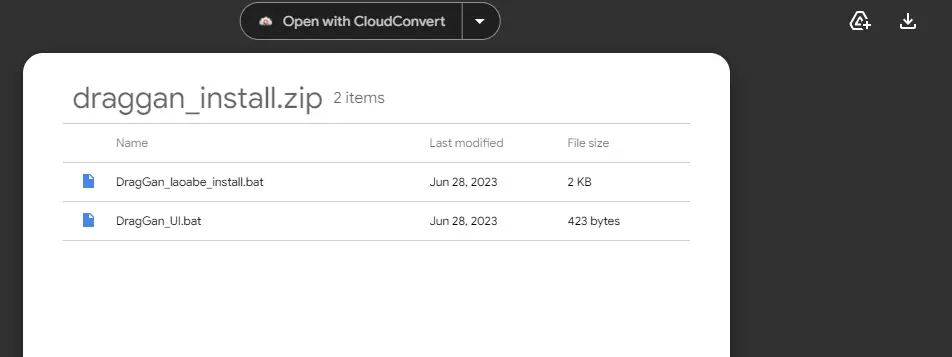
- Download the draggan_install.zip file.
- Choose the directory where you want to install DragGAN and save the file there.
- Close the DragGAN download page.
2. Installing DragGAN
- Open the folder where you saved the downloaded file.
- Extract the two files contained in the compressed folder. Password is urthebest.
- Move the extracted files to the previous directory.
- Right-click in the directory and select “Paste” to paste the files. You may be prompted for a password; enter the provided password.
- Once the extraction is complete, you will have two files in the directory.
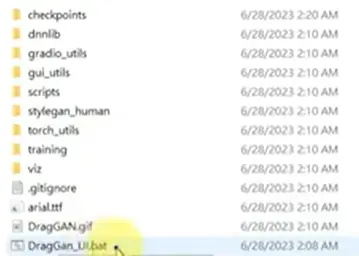
Open the file named “DragGan_UI” to begin the DragGAN installation.
Follow any on-screen instructions or prompts to complete the installation process. This may take some time, so be patient.
If the DragGAN installation process gets stuck, try running it as an administrator. If you encounter any warnings related to the pip version, ensure that your pip is updated to version 23.1.2 or newer.
Once the installation is complete, you will see a text prompt indicating the successful installation of DragGAN. Close the installer.
3. Downloading the DragGAN Model
To proceed with using DragGAN, we need to download the GragGan model.
- Click the provided URL for other model downloads.
- Scroll down the page and download the human model (styleGAN).
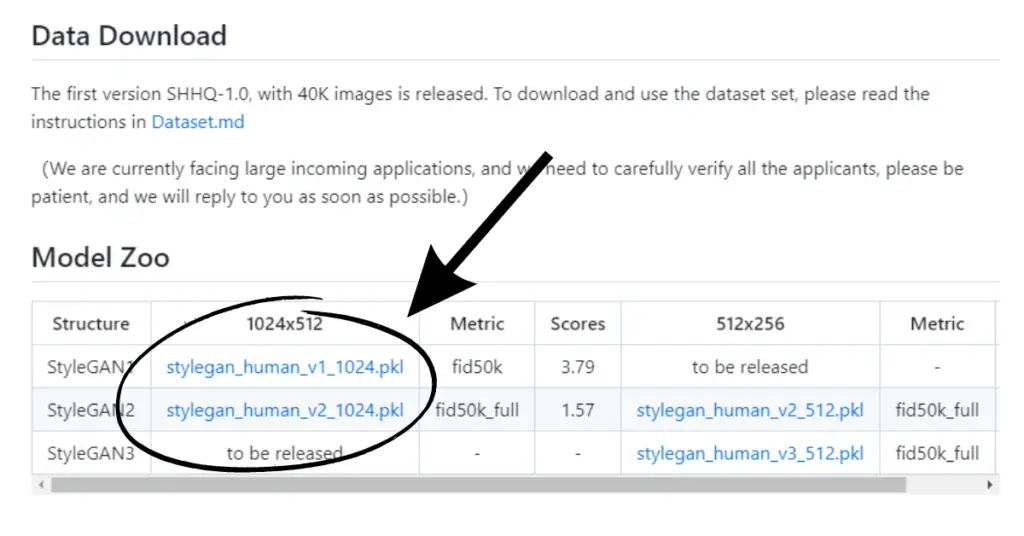
- Save the downloaded file to the “checkpoints” folder within the DragGan installation folder.
Part 3: DragGAN Execution and Simple Operation Tutorial
Finally, let’s explore how to execute DragGAN and perform simple operations.
- Open the file manager and navigate to the folder where you installed DragGAN.
- Locate the “DragGan_UI” file and double-click to execute it.
- This will open the DragGAN user interface for Windows. Please note that the initial loading of the model may take some time.
- Once the graphics appear, you can start using DragGAN.
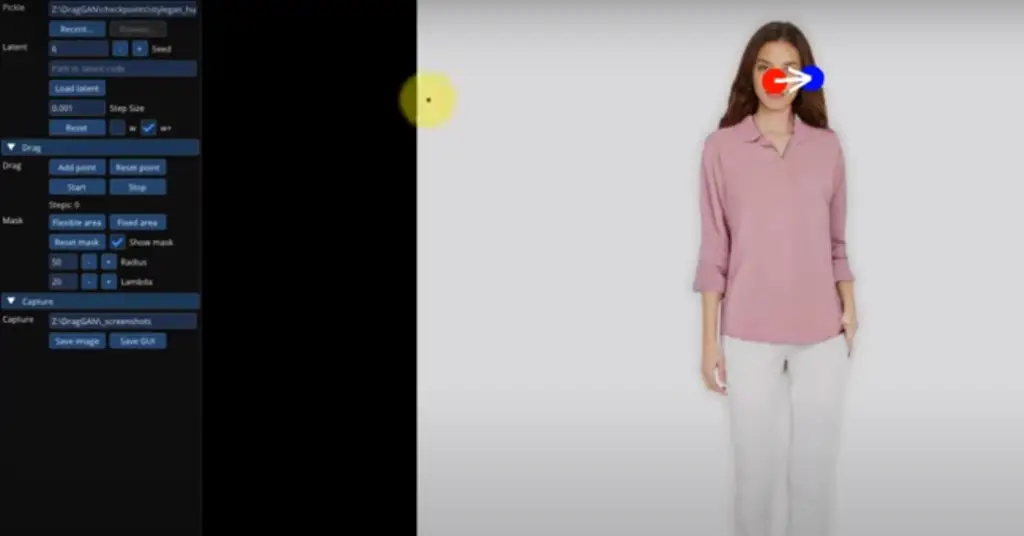
- The interface provides various options. You can click the “Zoom” button to select a different model and adjust the seed to generate different images.
- To animate the image, click the red dot to start and the blue dot to end. This will create a head-turning effect.
- Be cautious, as excessive clicks may cover your face if the movement range is too large. You can use the reset button to restore the original image.
- The MASK button allows you to draw a range on the image to limit the movement. Clicking it again enables setting the red and blue points. Anything beyond the masked range will result in the image freezing.
- The stop button is used to halt the animation, and the upper button clears all dots.
- You can also adjust the mask size using the provided options.
- Additionally, DragGAN includes a capture function that allows you to save images and the GUI interface.
Give it a try and experiment with the various features DragGAN offers.
Credit: All the installation process are taken from here.
While it may take some time for the animations to render, the Windows version generally provides a smoother experience compared to the Collaboratory version.
Conclusion:
You’ve successfully installed DragGAN AI on your Windows system. Now you can explore the possibilities offered by this powerful AI tool.
Quick Links:
| Python Download | python.org |
| Git Download | Click Here |
| Nvidia CUDA Download | Click Here |
| Style GAN Model Download | Click Here |
| DragGAN Github Page | Click Here |
| DragGAN Documentation | Click Here |