How to Use DragGAN Playground Demo Online?
When you visit the playground demo page, you’ll encounter an interface split into two parts. The left side holds the settings, while the right side showcases the image.

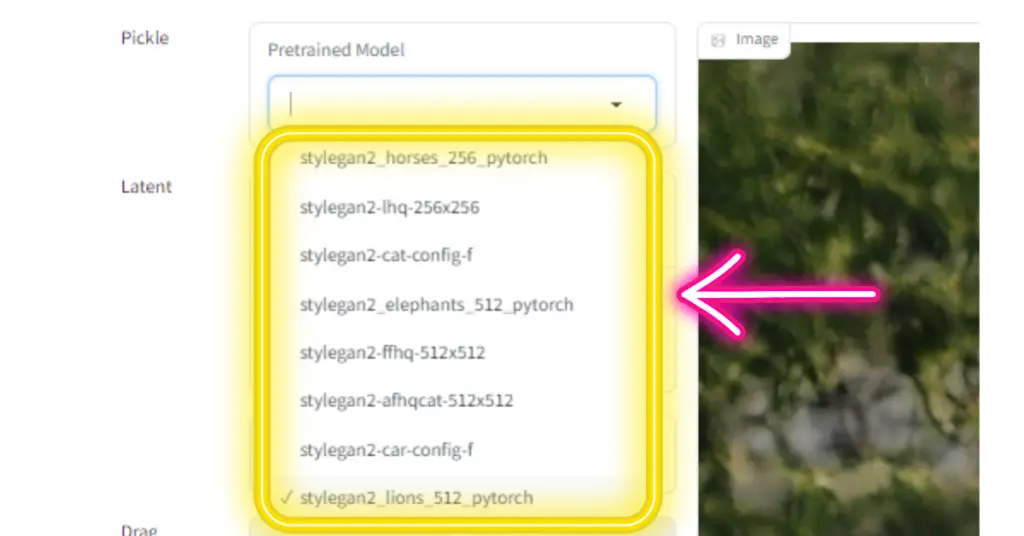
- To kick things off, pick a pre-trained model from the available options in the settings section. This choice shapes how the DragGAN AI tool behaves and its characteristics.
Next up, adjust the “Seed” value to create the initial image. The seed value determines where the image generation process begins.
Once the seed value is set, you can start adding points to the image. These points serve as markers for the DragGAN AI tool, guiding it on the specific changes you desire.

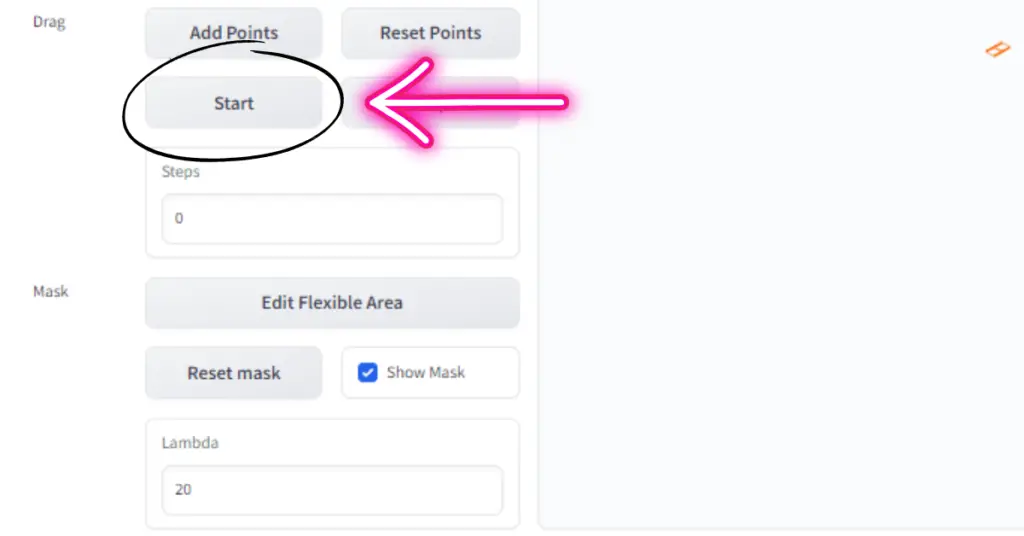
After adding points, hit the “Start” button to set the DragGAN AI model in motion.
While the model operates, you’ll witness the red point approaching the blue point, and the image transforming accordingly. Enjoy experimenting and exploring the interactive image manipulation capabilities of DragGAN AI. Feel free to continue adding or adjusting points to further enhance the image.
Understanding DragGAN Settings:
Before diving into image editing, it’s crucial to grasp the various settings and options available in DragGAN. Let’s take a closer look at each setting:
1. Pre-trained Model
Under the settings section, find a dropdown menu labeled “Pretrained Model.” Here, you can choose different pre-trained models that define how DragGAN AI operates.
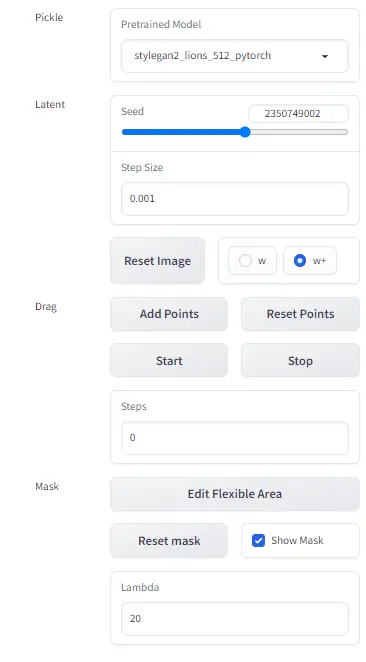
2. Latent: Seed Value
The “Seed Value” determines the initial image created by DragGAN AI. Tweaking this value alters where the image manipulation begins.
3. Reset Image Button
To start afresh or revert the image to its original state, simply click the “Reset Image” button. This action undoes any modifications made, restoring the image to its initial form.
4. Drag: Add Point Button
The “Add Point” button lets you directly place points on the image. These serve as markers for the DragGAN AI tool to understand your intended alterations.
5. Reset Points Button
To clear all added points and begin anew, click on the “Reset Points” button. This allows you to redefine the areas of the image you want to manipulate.
6. Start and Stop Buttons
Initiate the DragGAN AI model by clicking “Start,” prompting the model to process and adjust the image based on the specified points and settings. Conversely, pressing “Stop” halts the model’s execution.
7. Mask: Reset Mask Button
The “Reset Mask” button removes any defined masks on the image. Masks help limit editing effects to specific areas, preserving parts of the image unchanged.
8. Show Mask Button
Click “Show Mask” to visualize the masked areas that remain unaffected by DragGAN AI editing.
9. Lambda: Lambda Value
The “Lambda Value” setting controls the intensity of editing effects on the image. Adjusting this value alters the level of modifications made.
Advanced Settings:
Apart from the primary settings, DragGAN AI offers advanced settings for precise customization:
1. Change Step Size
This setting modifies the learning rate during drag optimization, influencing how swiftly or slowly the model adapts to changes.
Select w or w+ Choose between “w” or “w+” as the latent space to optimize. Editing in the “w” space significantly impacts the image, while the “w+” space might take longer but often yields better results.
2. Edit Flexible Area
The “Edit Flexible Area” lets you create a mask restricting changes to specific image regions. Defining a mask ensures certain areas remain untouched during editing.
These advanced settings empower you to fine-tune your image editing experience with DragGAN AI.
Now that you’ve familiarized yourself with DragGAN settings and advanced options, you’re set to explore the fascinating world of interactive image manipulation.