What if I will say you have the power to erase any unwanted object from your photos and replace it with something else very smoothly?
Well, get ready to be amazed because Canva’s brand new AI magical photo editing tool, Magic Edit, is here to replace anything from the image. You can also call it a Canva AI Magic eraser photo editor.
In this step-by-step guide, I’ll walk you through the process of using Canvas MAGIC EDIT, so you can easily remove and replace objects in your photos like a pro.
The Power of Magic Edit: Removing and Replacing Objects with Ease
You can easily remove the unwanted or replace the objects using the Canva Magic Edit feature.
All you need to do is brush over the area you want to change and describe what you’d like to see there instead.
Magic Edit will work wonders, turning your vision into reality.
Where to find magic edit in Canva?
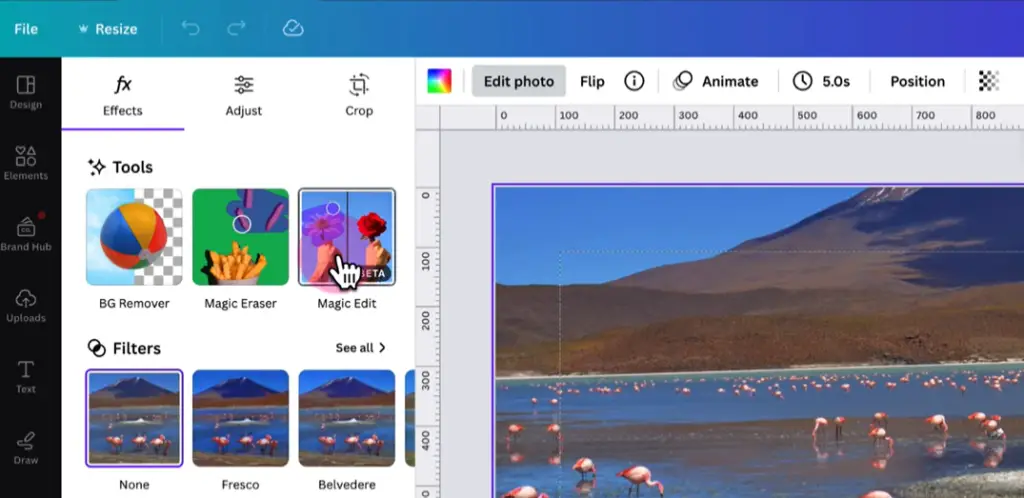
Firstly Upload the Image and Click on Edit photo. Now, In the tools section, you’ll find the Magic Edit Option in the top left-side corner.
Best AI Image Generators 2023 You Should Know
How to use Canva AI Magic Edit: Step-by-Step Guide
Step 1: Visit Canva.com
Firstly, go to Canva.com. Click on the “Sign In” or “Sign Up” button to access the wonderful world of creativity.
If you’re new to Canva and don’t have an account yet, simply click on “Sign Up” and proceed to create a new account.
Step 2: Uploading Your Photo
To get started with Magic Edit, you’ll need to upload your photo into Canva.
You can do this in two ways: from your home page by clicking on the “Upload” button or by accessing a template that already has the photo you want to edit.
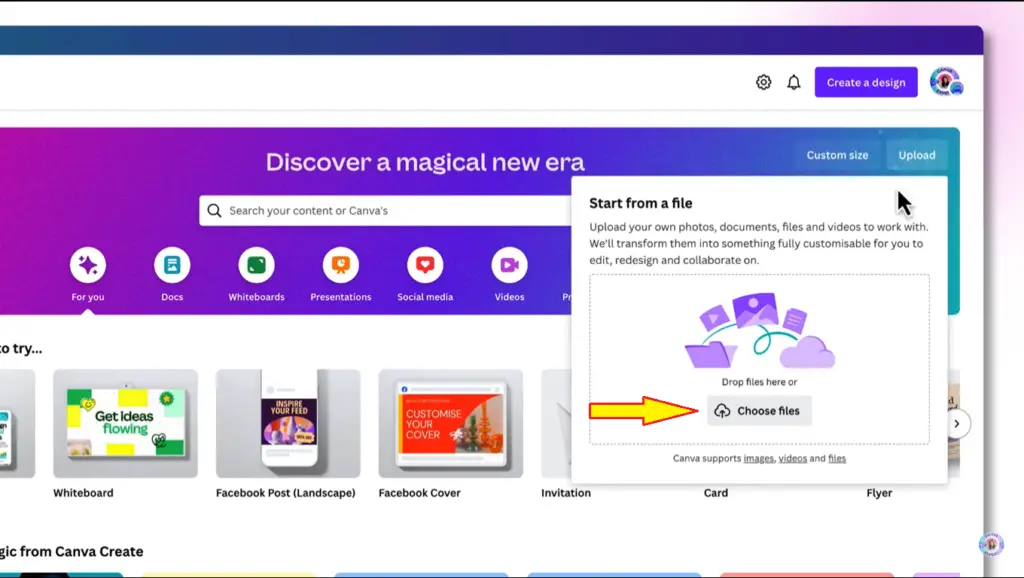
Once you’ve chosen your photo, you’re ready to dive into the magic!
Step 3: Enter the Magic Edit Mode
With your selected photo in place, head to the top left-hand corner of your Canva toolbar and click on “Edit Photo.”
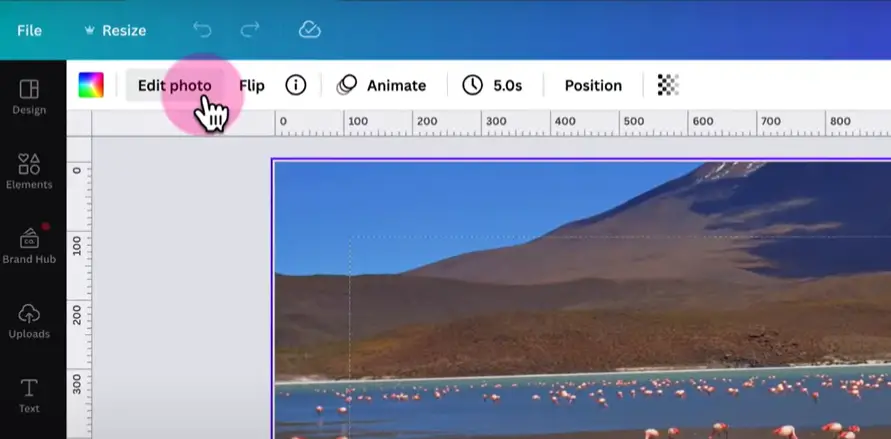
Within the magical photo editing tools, you’ll find “Magic Edit” at the end of the list.
Click on “Magic Edit” to enter the enchanting world of object removal and replacement.
Step 4: Using the Magical Brush
Now, behold the magical brush, which is actually a little circle that hovers over your photo.
You can adjust the brush size to your liking by clicking on the button in the slider bar.
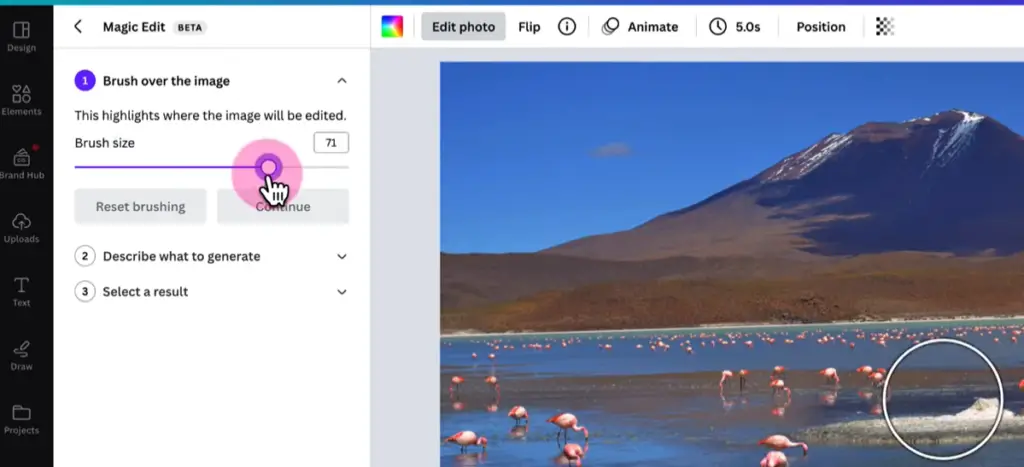
To increase the brush size, slide it to the right, and to decrease it, slide it to the left.
Step 5: Erase and Replace an Object
Let’s put the magic to work!
Suppose you want to remove a group of flamingos from your photo and replace them with a picture of a cute duck.
Use the magical brush to paint over the flamingos you want to remove.
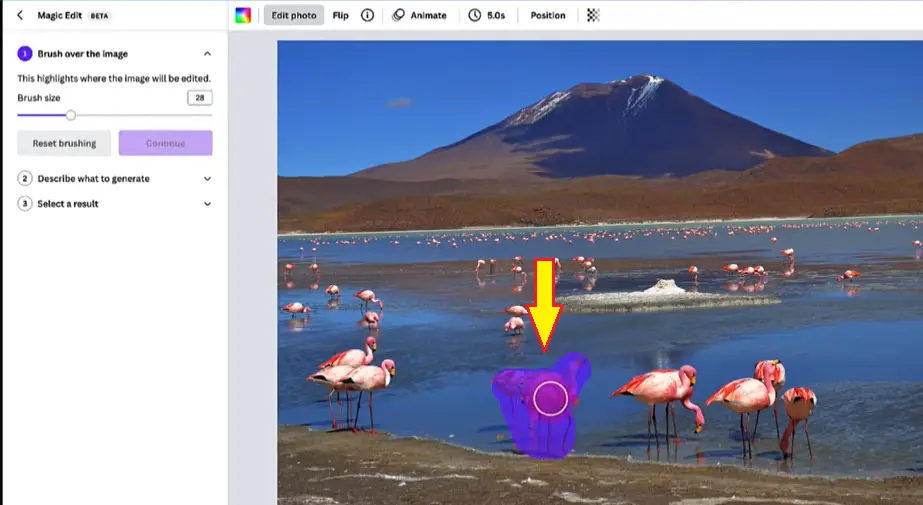
Once you’ve covered the area, release the cursor.
Step 6: Describing the Replacement
After erasing the unwanted objects, click on the “Continue” button.
In the box underneath, describe what you want to replace the flamingos with.
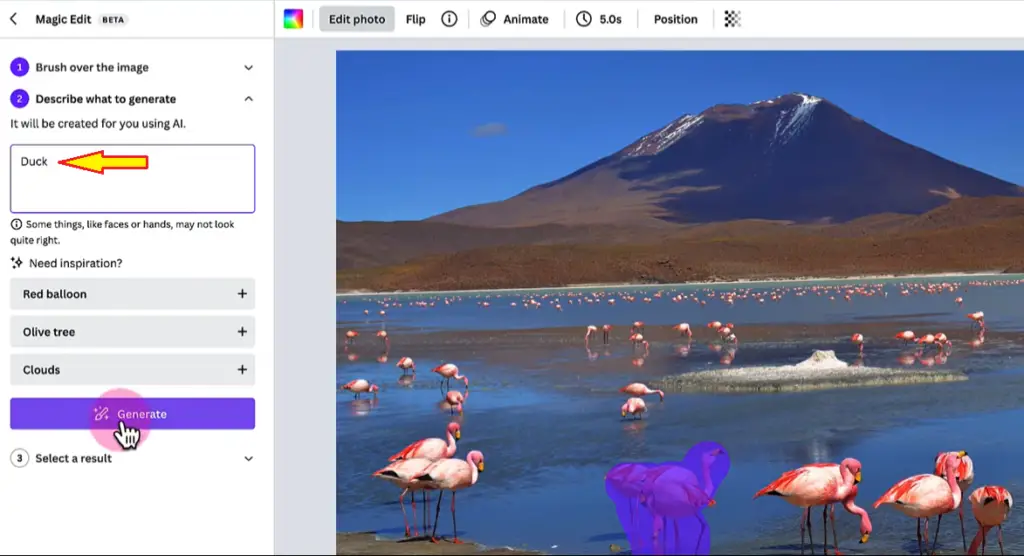
For example, type “Duck” in the description box.
Step 7: Witness the Magic Happen
Now, the grand moment has arrived!
Click on “Generate” and watch in amazement as Canva works its magic.
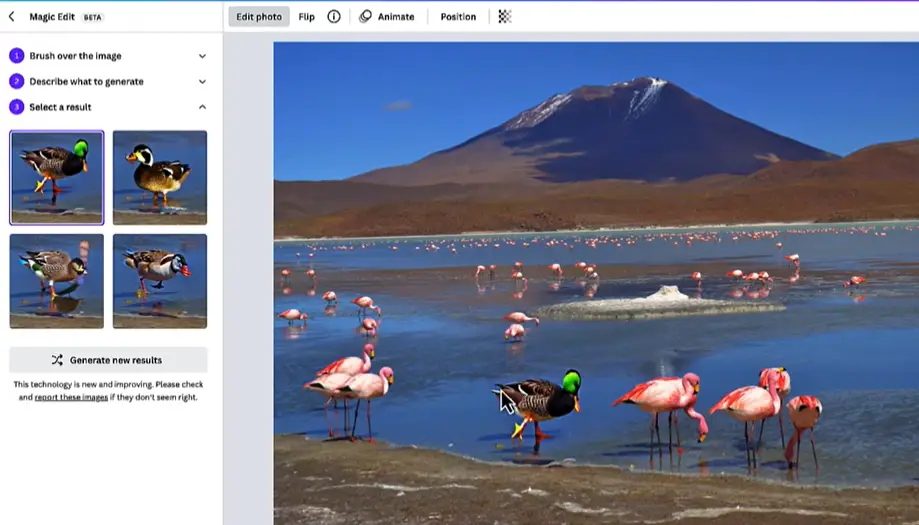
You’ll see that Canva automatically generates four different images of the replacement.
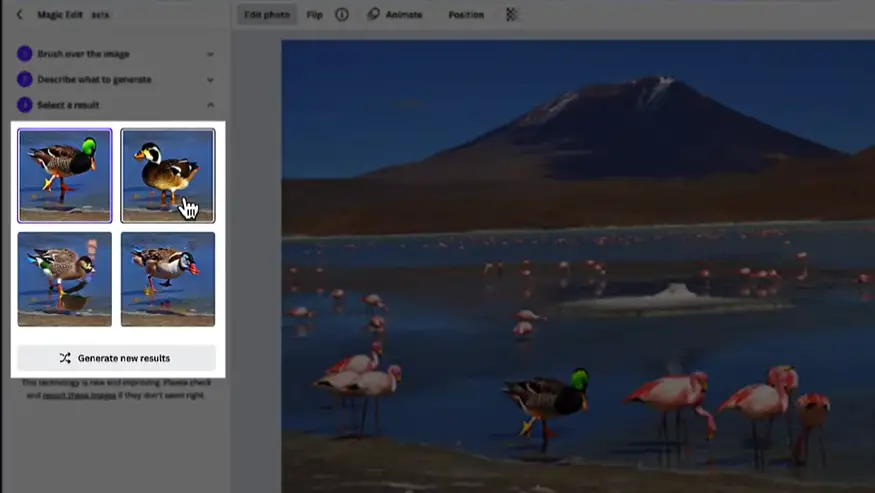
If you’re not satisfied with the first option, click on the thumbnail images to explore the others.
Step 8: Finalizing Your Edit
Once you’ve found the perfect replacement, click on “Done” to save your magical creation.
Voilà! You’ve successfully used Canva’s MAGIC EDIT to remove and replace objects in your photo.
Flowers Blooming with Magic Edit: A Floral Adventure
Let’s take a look at another magical adventure and replace a rather dull-looking dandelion with a vibrant flower.
Use the same steps as before—select your photo, click on “Edit Photo,” and dive into the wonders of Magic Edit.

Paint your brush over the dandelion, describe your desired replacement (“Rose” sounds delightful), and let the magic unfold.
Canva will present you with multiple options, and it’s time for you to choose the one that best suits your vision.
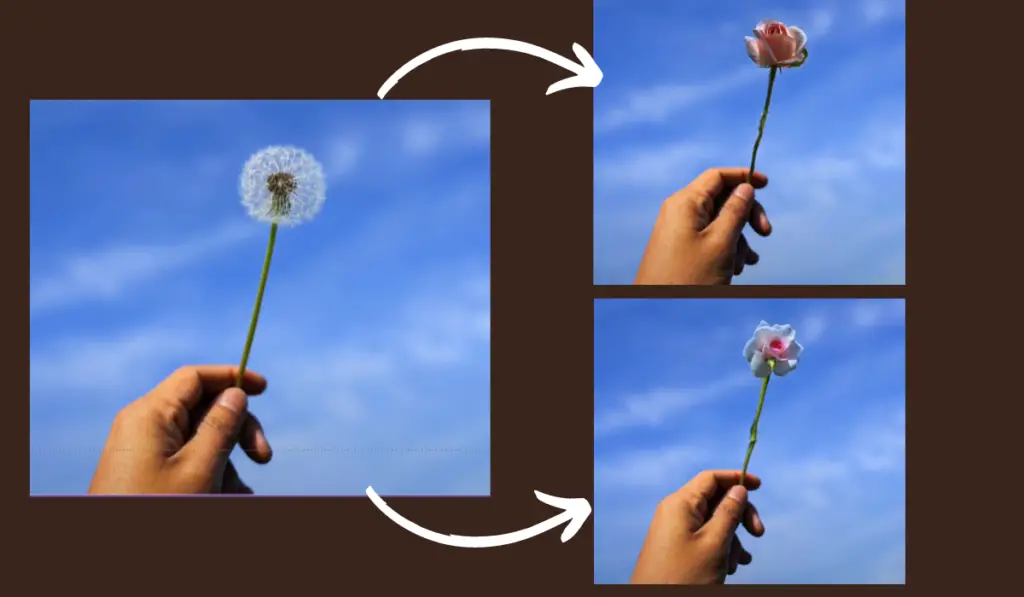
With a click of “Done,” your once ordinary photo is now a vibrant work of art, all thanks to the power of Magic Edit.
What to Avoid When Using Magic Edit:
There are a few things to keep in mind.
First off, it’s best to avoid adding faces and hands for now, as the results might not look as expected.
Also, stick to adding one thing at a time and then repeat the process for any other additions you want to make.
To stay on the safe side of copyright, refrain from adding celebrities or using well-known brands.
Keep in mind that there might be some limitations as this technology is relatively new.
Sometimes, the unbrushed part of your photo may appear slightly pixelated compared to the surrounding image.
However, don’t let these minor hiccups deter you from experimenting with Magic Edit’s magical powers!
Experiment with Magic Edit Beta Version
Remember, Magic Edit is part of Canva’s AI tools and is still in Beta, which means there’s ongoing learning and development behind the scenes.
So, if you don’t get the desired results at first, don’t be disheartened.
Keep experimenting, and you’ll soon master this enchanting photo editing tool!
Wrap up the Tutorial:
You’ve learned the art of using Canva’s MAGIC EDIT to perform captivating photo transformations. Now, you can confidently erase unwanted objects and replace them with your wildest imaginations.
But that’s not all—Canva has a whole arsenal of AI-powered design generation tools waiting for you to explore.
Stay tuned, and in our next tutorial, I’ll show you how to create beautifully designed templates with just a click.