
Just yesterday, I was discussing an alternative to Devin AI called Devika AI Software Engineer. Devika AI is the latest AI open source project that will help you in developing software’s. It’s easy to install and run on the local system.
While Devin AI showcased promise, its accessibility posed a significant challenge for the average AI user. It demanded coding proficiency, lacked an intuitive user interface, and hindered effective utilization of AI agents.
But Devika AI is the new open-source alternative designed to bridge this accessibility gap. Here, in this article we’re providing step by step guide on how to install and run the Devika AI on the local system.
What is Devika AI Software Engineer?
Devika AI is the open source AI software engineer capable of comprehending high-level human instructions, breaking them down into actionable steps, conducting relevant research, and generating code to achieve specified objectives.
This AI will become the valuable asset for the developers across various proficiency levels. Devika coding functionality is same like human coder.
Installing Devika (Quick Guide)
Prerequisites: Ensure you have Git, Python and Ollama installed on your system.
Clone Devika Repository: Use Git to clone the Devika repository onto your desktop.
Install Dependencies: Go to the Devika folder and install the necessary dependencies.
Configure APIs: Set up API keys for required services by editing the config.yml file.
Start Devika Server: Launch the Devika server using the provided command.
Compile and Run UI: Compile and run the Devika UI to access its frontend and backend functionalities.
How to Install Devika AI: Step By Step Guide
Follow these step-by-step instructions to install Devika AI on your system:
Step 1: Backend Development
1.1 Clone the Repository: Go to the Devika AI repository on GitHub (github.com/stitionai/devika) and clone it using the command:
git clone https://github.com/stitionai/devika.git1.2 Navigate to the Devika Folder: Move to the cloned Devika directory using:
cd devika1.3 Create a Virtual Environment: Use conda to create a virtual environment named devika1 with Python 3.11:
conda create -n devika1 python=3.11 -y1.4 Install Requirements: Install the required dependencies listed in requirements.txt:
pip install -r requirements.txt1.5 Install Playwright: Install Playwright with dependencies using:
playwright install --with-deps1.6 Configure API Keys: Open the config.toml file and input your API keys for services like Bing and Claude.
1.7 Start Devika Server: Begin the Devika server by running:
python devika.pyStep 2: Frontend Development
2.1 Install Bun: Install Bun by following the instructions provided on bun.sh/docs/installation. For Windows PowerShell, use:
powershell -c "irm bun.sh/install.ps1|iex"2.2 Check Installation: Verify that Bun has been installed correctly by typing bun in PowerShell.
2.3 Install UI Dependencies: Install UI dependencies using:
bun install2.4 Run UI Development Server: Start the UI development server with:
bun run devFeatures of Devika AI:
Advanced AI Planning and Reasoning: Devika able to handle complex coding tasks efficiently.
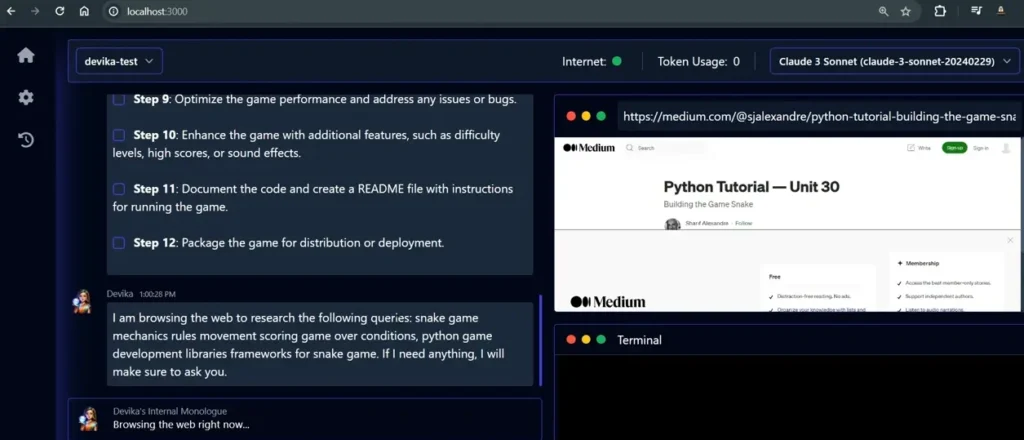
Contextual Keyword Extraction: It can search on internet and retrieval of relevant research information, optimizing the development process.
Seamless Web Browsing: Facilitates data gathering from online sources, enriching the development process.
Multi-Language Code Writing: Capable of write code in different languages, diverse project requirements, enhancing versatility.
Dynamic Agent State Monitoring: Tracks and visualizes progress, providing insights into project advancement.
Natural Language Interactions: Utilizes a chat interface for intuitive communication, enhancing user experience.
Project-Based Organization: Efficiently manages projects, optimizing workflow and productivity.
Extensible Architecture: Allows for the integration of new features, fostering continuous improvement.
Demonstrating Devika’s Capabilities
To illustrate Devika’s abilities, let’s dive into a practical example where it implements a Snake Game of Life in Python using Pygame.
Step-by-Step Guide:
- Define the Objective: Provide the instruction to implement a Snake Game of Life in Python using Pygame.
- Generate a Plan: Devika outlines the key steps required to accomplish the task:
- Research and understand the rules of the game.
- Set up the Pygame environment to create the game window.
- Implement the necessary data structures.
- Write the game logic.
- Render the game grid on the Pygame window.
- Implement user controls and visual enhancements.
- Thoroughly test the game.
- Document the code and create a README file.
- Execution: Devika executes the plan seamlessly, using its AI capabilities to navigate through each step efficiently.
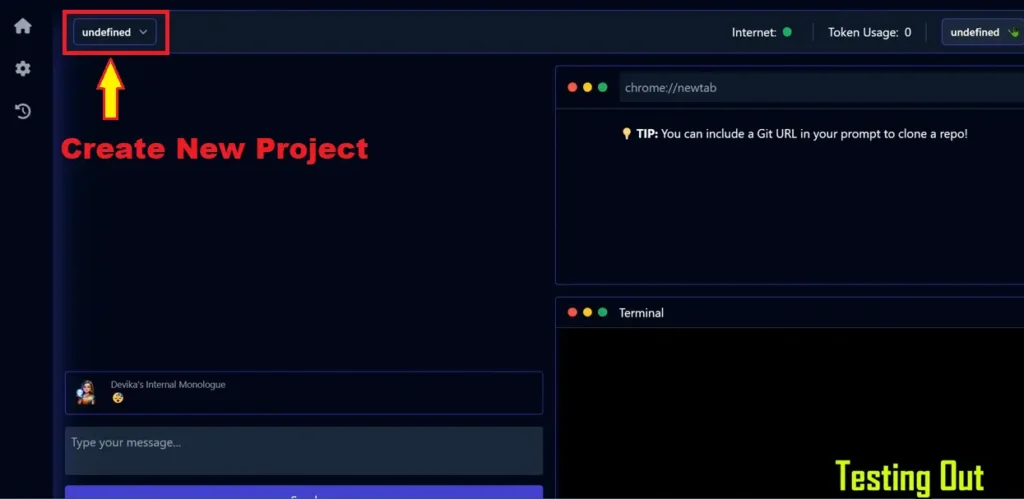
Create New Project with Devika AI
Now that Devika AI is up and running, you can access its interface via your browser at http://127.0.0.1:3000.
Here’s how to proceed:
1. Create a New Project: Select your desired model and give your project a name using the “New Project” button.
2. Input Your Prompt: Write your prompt or task instructions in the provided text area.
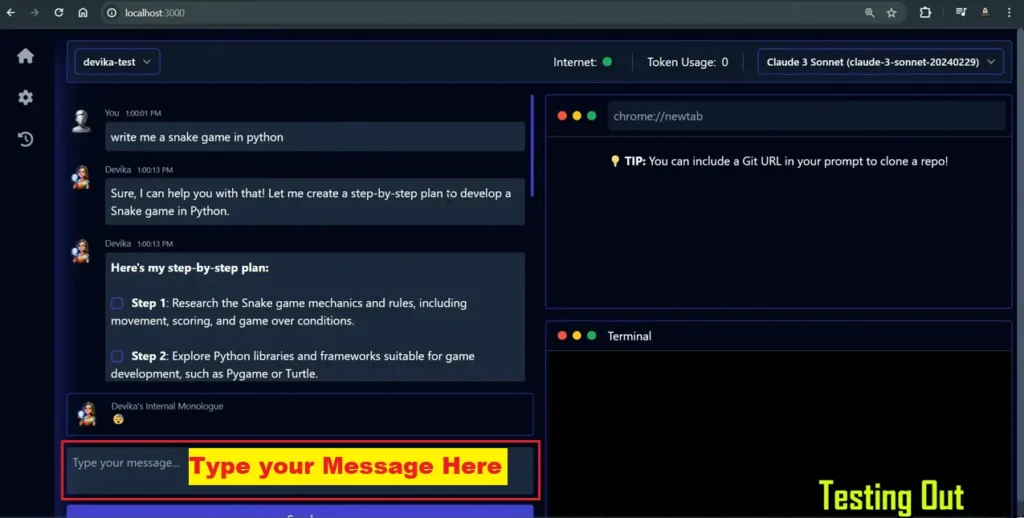
3. Let Devika Work: Allow Devika AI to process your instructions and perform the required tasks.
4. Access Results: Once Devika completes its tasks, you can find the results in the projects folder.
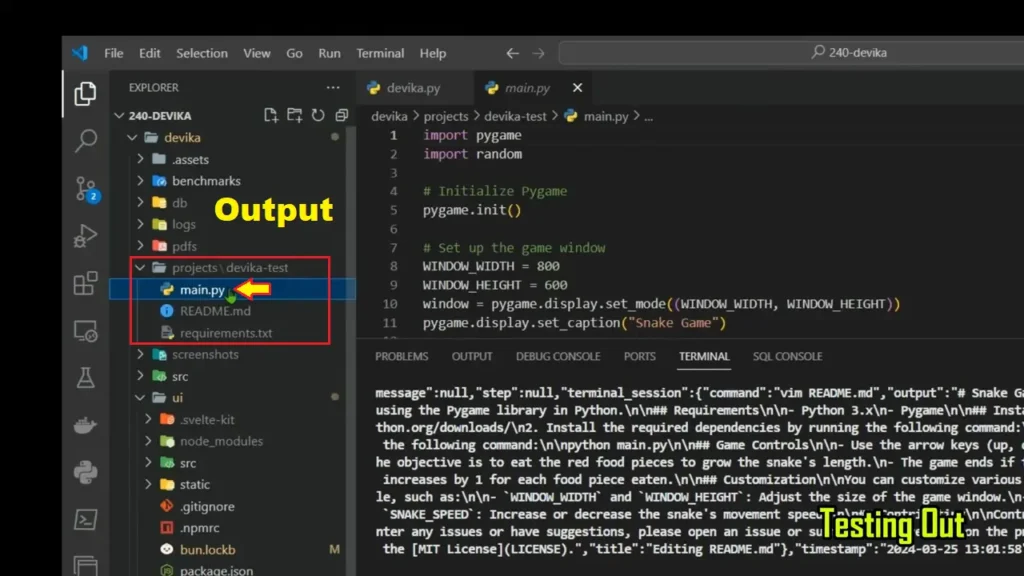
5. Run Files: Navigate to the project folder and run the generated files to test and interact with the outcomes.
Conclusion
In conclusion, Devika AI is currently in early development/experimental phase. While using it you may be occurred with some unimplemented/broken features at the moment. Devika uses large language models like GPT-4, Claude and Ollama for language understanding, generation and other coding skills. This AI is going to empowers the developers to smoothen their coding processes.