
In this tutorial, we’re going to dive deep into AutoGen AI, a fascinating piece of AI technology that allows you to set up multiple artificial intelligence agents working together to accomplish various tasks.
Autogen AI is the latest AI agent builder which is a trending topic nowadays. If you’re ready to use the power of AutoGen and create AI agent teams, you’ve come to the right place.
I’m here to guide you through every step of the process.
What is AutoGen AI?
AutoGen AI is an AI technology that has the potential to customize the way we approach various tasks. You can think of it as Chat GPT combined with a code interpreter and customizable plugins, all working seamlessly together to assist you in your projects.
In this tutorial, I’ll walk you through setting up AutoGen AI on your computer and provide a hands-on demonstration of its capabilities.
Prerequisites
Before we get into the installation process of AutoGen AI, you’ll need a few things to get started:
- Code Editor: You can use any code editor you prefer, but for this tutorial, I’ll be using Visual Studio Code.
- Anaconda: Make sure you have Anaconda installed on your system. If you don’t have it, a quick online search can help you install it.
- OpenAI Account: You’ll need an OpenAI account to access the required API. If you don’t have one, sign up for an account.
Note: For Python and Anaconda installation Click Here and Read the Python and Anaconda installation steps carefully.
Autogen AI Tutorial: Full Setup Guide:
Setting Up Your Environment
Let’s begin by setting up your development environment for AutoGen. Follow these steps:
- Create a New Python File:
- Open your code editor (Visual Studio Code in our case).
- Create a new file and save it. If you don’t have a project folder yet, create one and save this file as ‘app.py‘.

- Open a Terminal:
- In Visual Studio Code, open the terminal by clicking the terminal icon in the top-right corner.
- Create a Conda Environment:
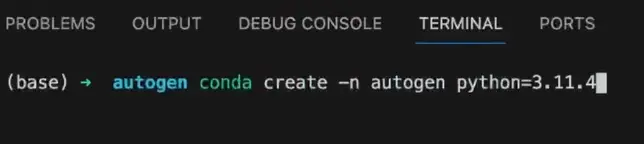
- To manage your Python versions and modules, create a Conda environment. In your terminal, run the following command:
conda create -n autogen python=3.11.4Ensure that the Python version you’re using matches the one specified (3.11.4 in this case). You can check your Python version by running python --version.
- Activate the Environment:
- Activate the ‘autogen’ environment by running:
conda activate autogen
You’ll know it’s active when you see the environment name in your terminal.
- Install AutoGen:
- Now, install AutoGen using pip with the following command:
pip install openai
If you’ve already installed it, you’ll see “requirement already satisfied.”
- Import AutoGen:
- In your Python file (‘app.py’), import AutoGen by adding this line at the top:
import autogen- Check Python Version:
- Confirm that Python is using version 3.11.4 (or the version you specified).
Configuration of AutoGen AI:
Now, let’s configure AutoGen by setting up essential parameters:
Import AutoGen:
At the top of your Python file, import AutoGen.
Defining the Model
In AutoGen, you need to specify the AI model you want to use. For this tutorial, we’ll use the “GPT 3.5 Turbo 16k” model.
API Key
You’ll also need to include your OpenAI API key. If you don’t have one, you can create an API key in your OpenAI account.
api_key = "your_api_key_here"
Create a Configuration JSON:
- Define the model and your API key in the configuration JSON. For this tutorial, we’ll use GPT 3.5 Turbo.
- Obtain your API key from your OpenAI account.
- Here’s how your JSON should look:
config = {
    "model": "text-davinci-002",
    "api_key": "YOUR_API_KEY_HERE"
}
LLM Configuration
The LLM (Language Model Configuration) allows you to set various parameters for your AI agents. Here are the configurations we’ll use:
- Request Timeout: Set to kill a request if the API doesn’t respond in time.
- Seed: A seed for caching to save time and money when running the same tasks.
- Temperature: Control the creativity of responses (0 for less creative, 1 for more creative).
Here’s how you can define the LLM configuration:
llm_config = {
    "request_timeout": 5,
    "seed": 42
}
Assistant and User Proxy Agents
In AutoGen, you can create multiple agents with specific roles. We’ll create an assistant and a user proxy agent. These agents can work together on tasks, with the user proxy acting on behalf of the user or asking for approval for certain actions.
assistant = openai.ChatCompletion.create(
    model="gpt-3.5-turbo",
    messages=[
        {"role": "system", "content": "You are an assistant that speaks like Shakespeare."},
    ],
)

user_proxy = openai.ChatCompletion.create(
    model="gpt-3.5-turbo",
    messages=[
        {"role": "system", "content": "You are a user proxy that follows instructions."},
    ],
)
Human Input Mode
AutoGen allows you to define how much manual input you want to provide for each task. There are three options:
always: It asks for user input at every step.terminate: It asks for user input when the task is completed.never: It never asks for user input.
For this tutorial, we’ll use terminate to keep it simple:
human_input_mode = "terminate"Set Maximum Consecutive Auto Reply
This setting limits the number of times agents can go back and forth with each other. We’ll set it to 10 to prevent infinite loops:
max_consecutive_auto_reply = 10Configure Termination Message
This message is used to identify when a task is completed. AutoGen will look for a specific keyword to know when to ask for feedback or initiate the next steps:
termination_message = "task is now complete"Code Execution Configuration
This configuration is essential for executing code. We’ll set the working directory to “web,” which will be a subdirectory created within your project folder to store code and files:
code_execution_config = { "working_directory": "web", "llm_config": llm_config }Set System Message
The system message instructs the user proxy on how to determine when a task is complete. You can use the default system message provided by AutoGen:
system_message = "You can safely ignore this message. It's just for system instructions."Task Implementation:
Now that we have our environment configured, let’s define a task for our agents. In this example, we’ll start with a simple task: “Write Python code to output numbers from 1 to 100 and store it in a file.”
Defining the Tasks
We’ll store this task in a variable named task:
task = """
Write Python code to output numbers 1 to 100 and store them in a file.
"""
Initiating the Chat
With our configuration and task ready, it’s time to initiate the chat. We’ll use the user proxy to start the conversation:
response = user_proxy.messages.create( model="gpt-3.5-turbo", messages=[ {"role": "system", "content": "You are a user proxy that follows instructions."}, {"role": "user", "content": task}, ] )This message will be sent to the assistant agent, and the conversation will begin.
At this point, your user proxy agent is communicating with the assistant agent, and the task is underway.
Executing the Task
You can execute the task by running the code. In this example, we’re asking AutoGen to write Python code to output numbers from 1 to 100 and store them in a file.
# Execute the task response = user_proxy.messages.create( model="gpt-3.5-turbo", messages=[ {"role": "system", "content": "You are a user proxy that follows instructions."}, {"role": "user", "content": task}, ] )Providing Feedback
After the task is completed, you can provide feedback to AutoGen AI. For instance, if the result doesn’t meet your expectations, you can ask for corrections or improvements.
Feedback is an essential part of training AI models to perform better.
Extending the Code
AutoGen’s capabilities are vast, and you can extend this code to create more complex AI agent teams, give them various tasks, and experiment with different prompts.
To make the task more challenging, modify the task description to output numbers up to 200, save it, and observe how the agents handle the new task.
AutoGen offers a world of possibilities for AI-assisted tasks and projects.
By following these steps, you’ve set up a simple task for your AI agents. You can continue to refine and extend your tasks, create more agents, and fine-tune the interactions as needed.
Full Code of app.py:
import autogen

config_list = [
    {
        'model': 'gpt-4',
        'api_key': 'API_KEY'
    }
]

llm_config={
    "request_timeout": 600,
    "seed": 42,
    "config_list": config_list,
    "temperature": 0
}

assistant = autogen.AssistantAgent(
    name="CTO",
    llm_config=llm_config,
    system_message="Chief technical officer of a tech company"
)

user_proxy = autogen.UserProxyAgent(
    name="user_proxy",
    human_input_mode="NEVER",
    max_consecutive_auto_reply=10,
    is_termination_msg=lambda x: x.get("content", "").rstrip().endswith("TERMINATE"),
    code_execution_config={"work_dir": "web"},
    llm_config=llm_config,
    system_message="""Reply TERMINATE if the task has been solved at full satisfaction.
Otherwise, reply CONTINUE, or the reason why the task is not solved yet."""
)

task = """
Write python code to output numbers 1 to 100, and then store the code in a file
"""

user_proxy.initiate_chat(
    assistant,
    message=task
)

task2 = """
Change the code in the file you just created to instead output numbers 1 to 200
"""

user_proxy.initiate_chat(
    assistant,
    message=task2
)
Conclusion
AutoGen AI is a powerful AI technology that can significantly enhance your work by enabling AI agent teams to handle various tasks efficiently. In this tutorial, we’ve covered the setup, configuration, task initiation, execution, and providing feedback.
Explore, experiment, and discover how AutoGen AI can revolutionize your AI-driven projects!
If you enjoyed this tutorial, be sure to read our latest AI Tutorials: