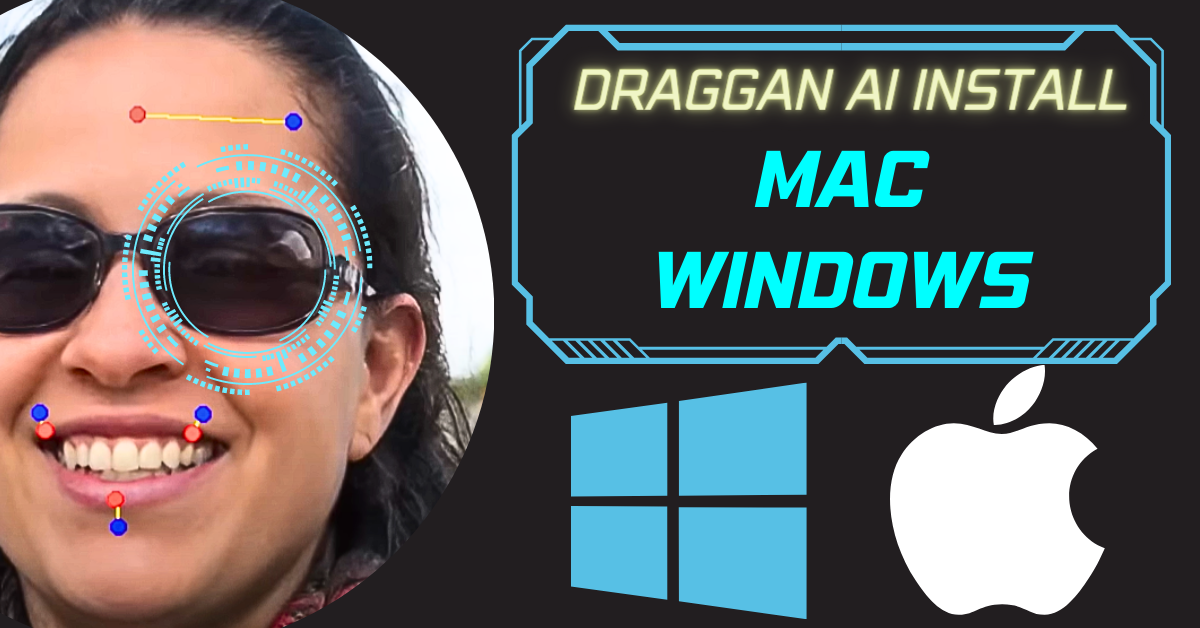
Introduction:
DragGAN AI is an impressive AI tool that allows you to manipulate images by selecting specific points. It automatically adjusts the image to fit those points, resulting in stunning transformations.
While the setup process can be a bit challenging due to some bugs and incorrect documentation, this step-by-step guide will help you install DragGAN AI on your MAC or Windows successfully.
DragGAN AI Installation Flow:
Before you begin, the installation of DragGAN AI is divided into three parts. Please carefully follow each part to successfully install DragGAN on your computer or PC.
- Part 1: Python Installation
- Part 2: Anaconda Installation
- Part 3: DragGAN Installation
If you have already installed Anaconda and python then you can directly jump to Part 3.
Part 1: Install Python
Step 1: Download Python
- Go to the official Python website link (python.org).
- Go to “Downloads.”
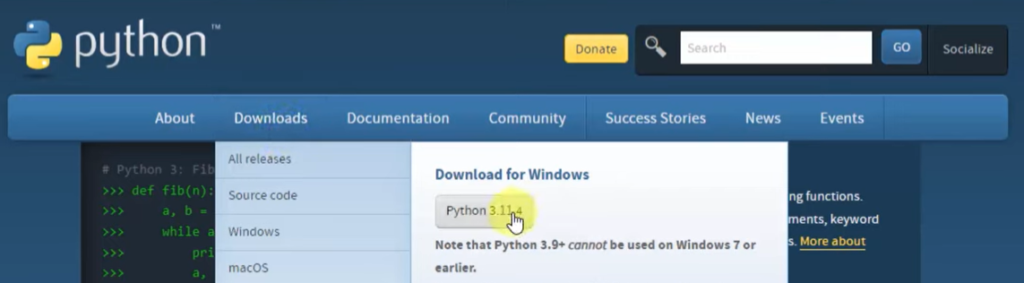
- Select the current version of Python, usually displayed as “Python x.x.x for Windows.”
- Click on the download link for the chosen version.
Step 2: Install Python
- Go to the downloaded executable file (usually in the Downloads folder) and double-click on it.
- In the Python setup wizard, select the “Add Python to PATH” option.
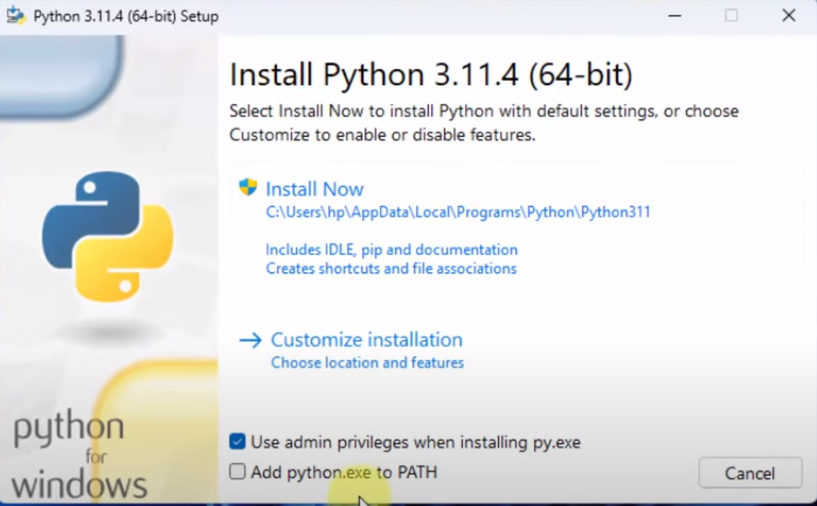
- Click on “Customize installation” to choose additional features.
- Leave all the optional features selected (including pip, which is used to manage Python packages).
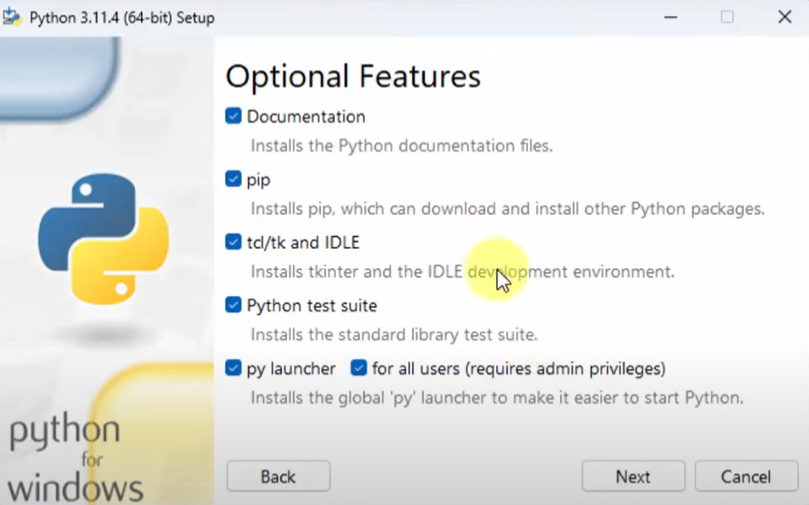
- Click “Next” to proceed.
- In the advanced options, select “Install Python for all users.”

- Keep the installation location as the default.
- Click “Install” to start the installation process.
- Wait for the installation to complete.
- Once the installation is finished, click “Close.”
Step 3: Verify the Python Installation
- Open the Start menu and search for “Command Prompt” (CMD).
- In the Command Prompt window, type the command:
python --version. - Press Enter to execute the command.
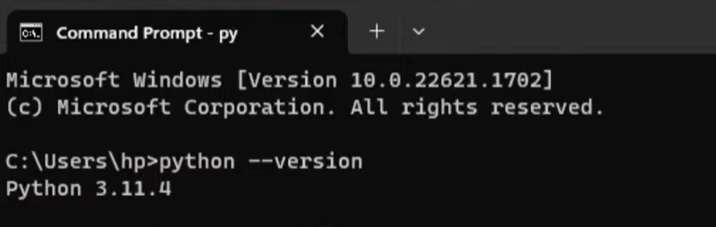
- The current version of Python will be displayed if the installation was successful.
Part 2: Install Anaconda
Step 1: Download Anaconda
- Open your preferred web browser and search for “Anaconda.”
- Click on the official Anaconda website link, “anaconda.com,” to access the website.
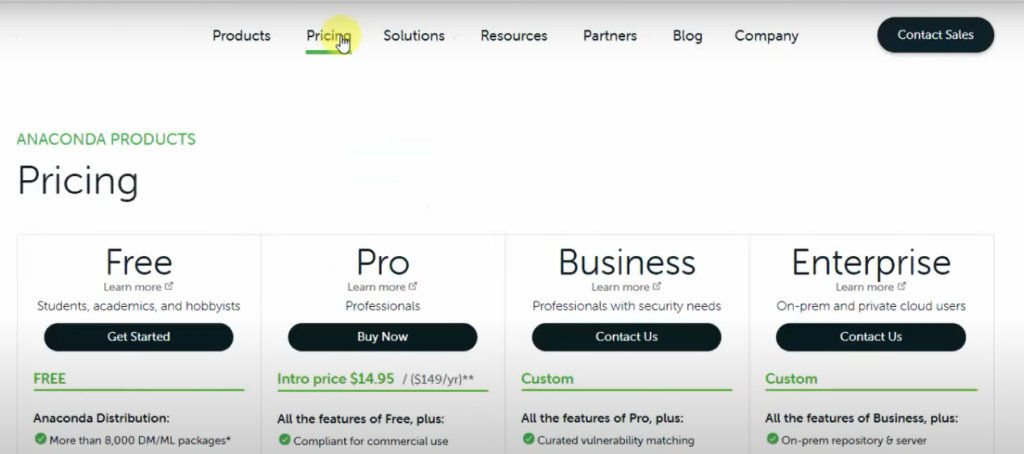
- Navigate to the “Pricing” section on the website.
- Look for the “Free Version” option and click on “Get Started.”
Step 2: Choose the Distribution and Download
- On the downloads page, select the distribution suitable for a 64-bit operating system (Windows or MAC).
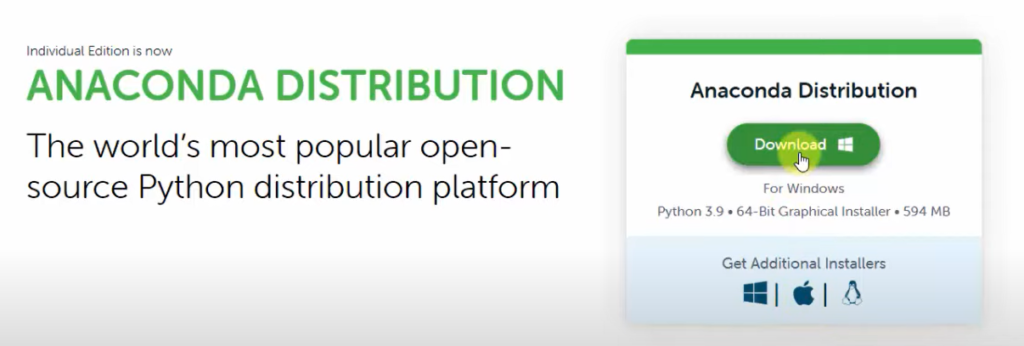
- Click on the “Download” button for the chosen distribution.
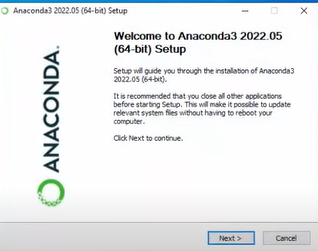
Step 3: Install Anaconda
- Go to the downloaded executable file and double-click on it to start the installation.
- The Anaconda setup wizard will appear. Click “Next” to proceed.
- Read and accept the license agreement by selecting the “I Agree” option.
- Choose the installation type. Select the “Just Me” option for the current user or “All Users” for all users on the system.
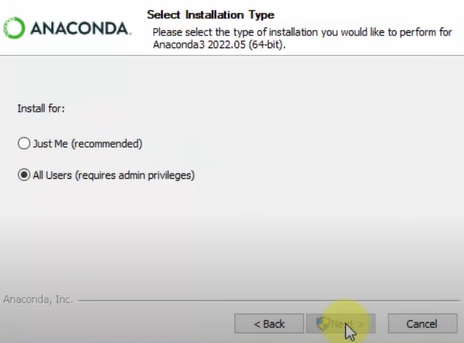
- Click “Next” to continue.
- Specify the installation location. It is recommended to keep the default installation path.
- Select the advanced options. Ensure the “Register Anaconda 3 as the system Python 3.9” option is checked.
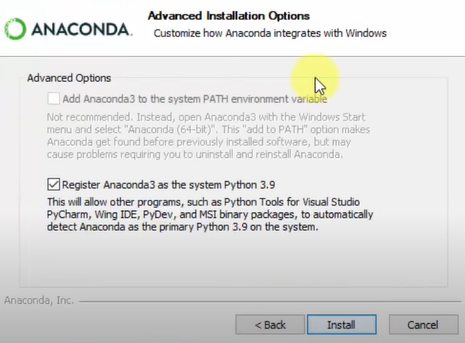
- Click “Install” to begin the installation process.
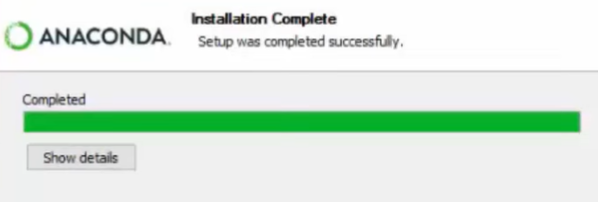
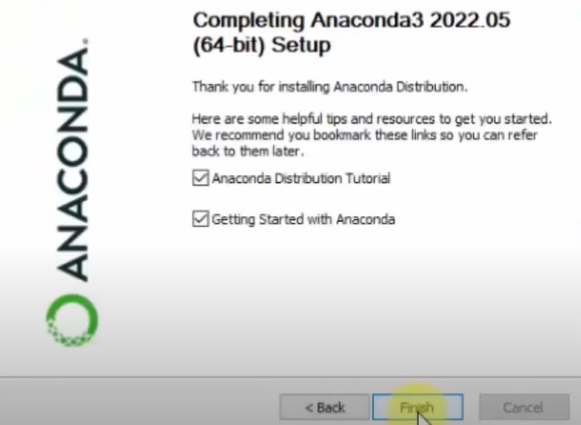
Step 4: Finish the Installation
- Once the installation finishes, click “Next” on the completion screen.
- If desired, select the options for adding Anaconda to the system PATH and associating Anaconda with .py and .pyc files.
- Click “Finish” to complete the installation.
How to Install DragGAN AI on Windows
Part 3: Install DragGAN
Step 1: Clone the DragGAN Repository
- Go to the official DragGAN repository on GitHub.
- Click the green “Code” button and copy the repository URL.
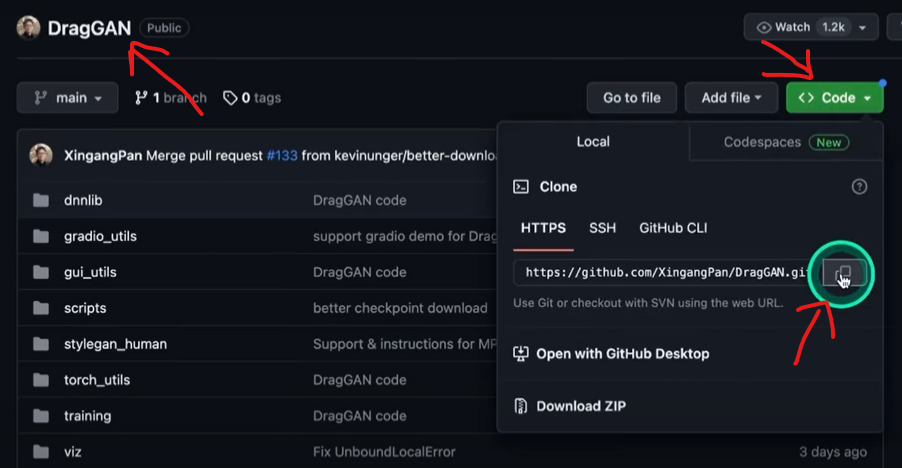
- Open a terminal window and navigate to your desired directory.
- Enter the command:
git clone <repository_url>, replacing<repository_url>with the copied URL.
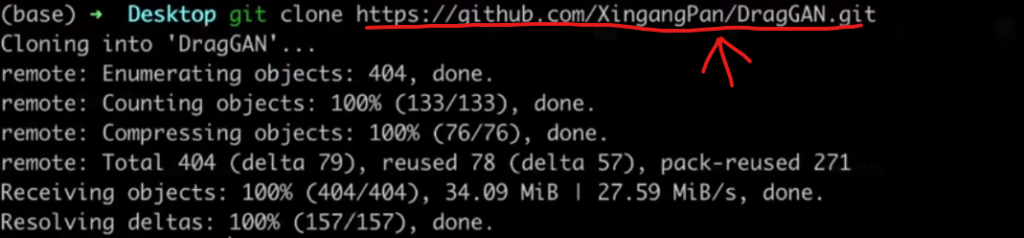
- Hit Enter to clone the repository to your local machine.
- Change into the DragGAN directory by running:
cd DragGAN.

Now go to step 2 and set up the conda environment.
Step 2: Set up the Conda Environment
- In the terminal, execute the following command to create the environment using the provided
environment.ymlfile:
conda env create -f environment.yml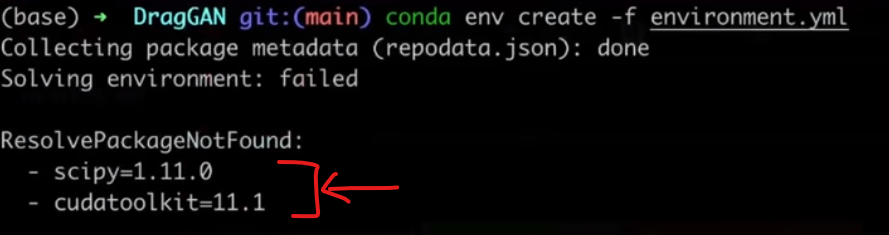
- Note that the environment name specified in the
environment.ymlfile is typically “stylegan3.”
Step 3: Resolve Package Dependency Issues
- Open Visual Studio Code (or any text editor of your choice).
- Use Visual Studio Code to open the
environment.ymlfile within the DragGAN directory. - Remove the line containing the Cuda toolkit information (e.g.,
Cuda toolkit: 11.1) as it’s not necessary for Mac.
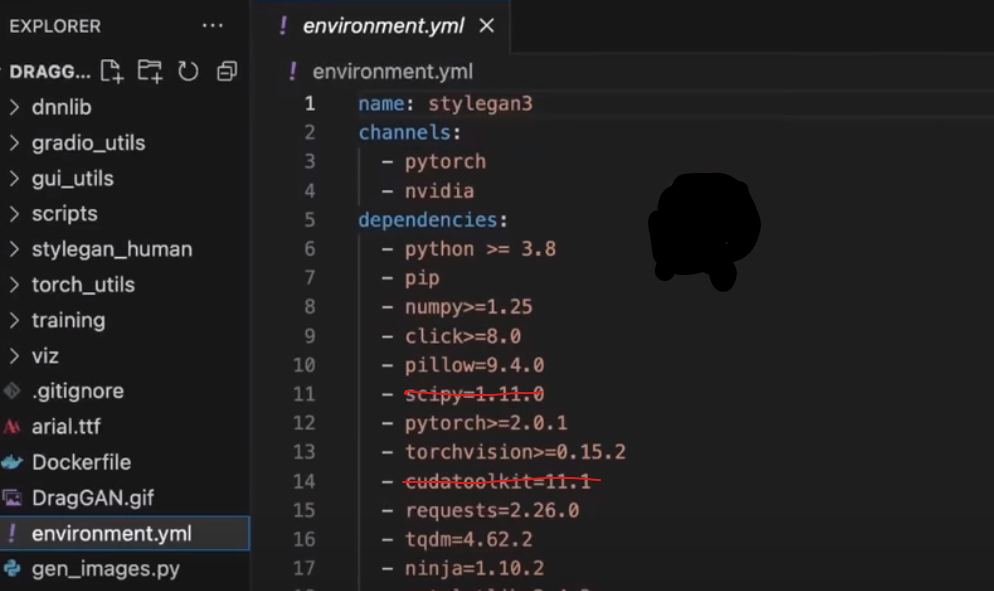
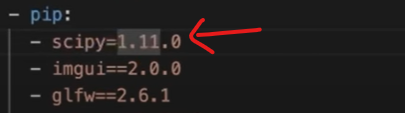
- Locate the
scipyline under dependencies and move it from there to thepipsection. - Replace the single equals sign with a double equals sign on the modified
scipyline.
- Save the changes and close the file.
Step 4: Activate the Conda Environment
- Return to the terminal and activate the Conda environment with the following command:
conda activate stylegan3
Step 5: Install Required Packages
- In the terminal, run the following command to install the required packages:
pip install -r requirements.txt
pip install -r requirements.txtStep 6: Enable MPS Fallback
To enable fallback to the CPU when using the Metal Performance Shaders (MPS) library, execute the following command: export PYTORCH_ENABLE_MPS_FALLBACK=1
export PYTORCH_ENABLE_MPS_FALLBACK=1
Step 7: Download Pre-trained Models
- Download the pre-trained models by running the command:
python scripts/download_model.py
- Wait for the download process to complete. This may take some time due to the size of the models.
Step 8: Launch the DragGAN Visualizer
- Start the DragGAN visualizer by executing the following command:
python visualizer_drag_gradio.py
- Copy the provided local URL from the terminal output.
- Open a web browser and paste the copied URL into the address bar.
- You should now see the DragGAN visualizer running in your browser.
Step 9: Explore and Manipulate Images
- Within the DragGAN visualizer, you can choose from various pre-trained models on the top left.
- Select an image category, such as “Lions,” “Dogs,” or “Humans,” to experiment with different subjects.
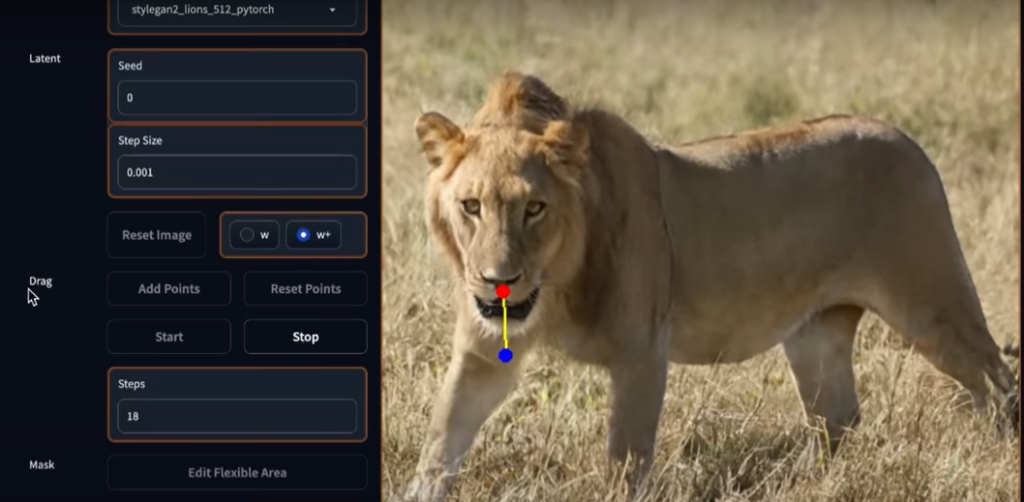
- Adjust the points on the image by dragging them to your desired positions.
- Click the “Start” button to initiate the image manipulation process.
- Observe the image transformation in real time.
- Once you are satisfied with the result, click the “Stop” button.
- You can download the manipulated image by clicking the download button provided.
- To reset the points and start over, click the “Reset Points” button.
Final Conclusion:
You have successfully installed DragGAN AI on your Mac. You can now unleash your creativity by manipulating images with this powerful AI tool. Experiment with different models and explore the endless possibilities of image transformation. Have fun and enjoy using DragGAN!
DragGAN AI Documentation: Click Here
DragGAN AI Related Tutorials:
Latest AI Tutorials: