
DragGAN is an artificial intelligence (AI) model that can transform images of objects into different visual styles by dragging a reference image.
If you want to run DragGAN AI in Google Colab, follow the steps below.
Install DragGAN AI in Google Colab?
Step 1: Go to the Official DragGAN GitHub Page
First, navigate to the official DragGAN AI GitHub page. You can find it by searching for “DragGAN AI GitHub” in the Google search.

Once you’re on the DragGAN AI GitHub page, look for the Google Colab link provided.
Step 2: Change Runtime Type to GPU
In Google Colab, after opening the DragGAN AI Google Colab link, go to the “Runtime” menu and select “Change Runtime Type.”
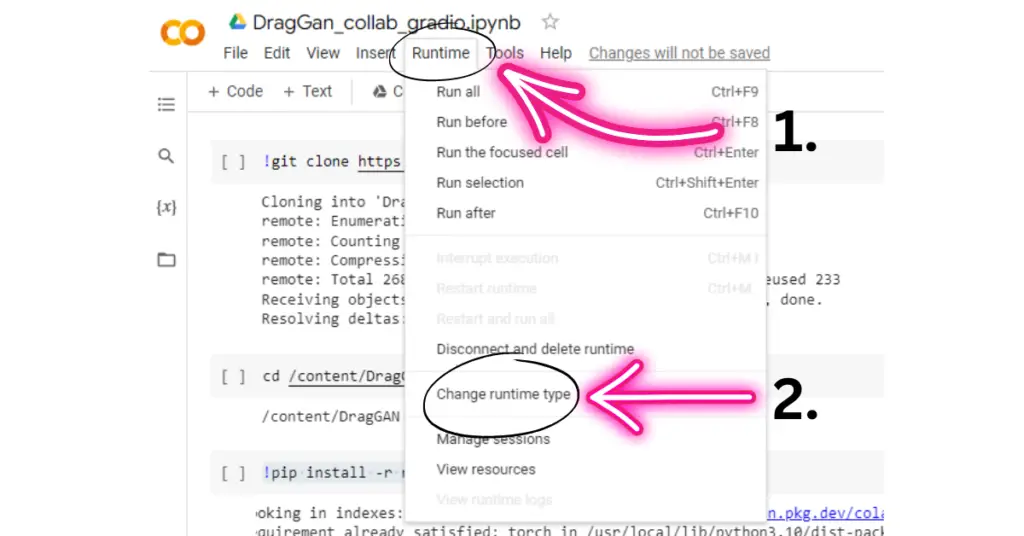
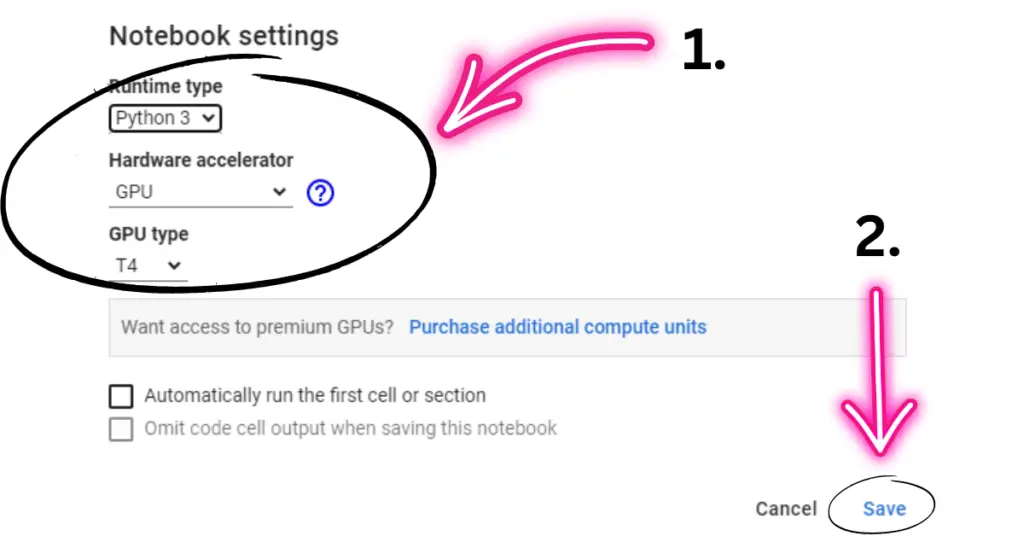
A dialog box will appear. In the dialog box, select “GPU” as the hardware accelerator. This will enable you to utilize the GPU for faster processing.
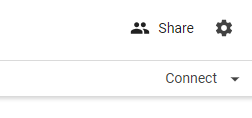
Step 3: Connect to the Runtime
Click on the “Connect” button in Google Colab to connect to the runtime. This will allow you to execute commands and run the DragGAN AI model.
Step 4: Clone the DragGAN Repository
To get the DragGAN code and necessary files, run the following command in a code cell in Google Colab:
!git clone https://github.com/XingangPan/DragGAN.git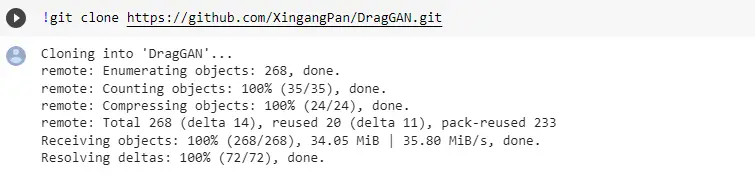
This command clones the DragGAN repository from GitHub into your Colab environment.
Read Also: Working of DragGAN AI
Step 5: Navigate to the DragGAN Directory
Use the following command to navigate to the DragGAN directory:
cd /content/DragGAN
This command changes the current directory to the DragGAN directory you just cloned.
Step 6: Install Required Dependencies
DragGAN has some dependencies that need to be installed. Run the following command to install them:
!pip install -r requirements.txt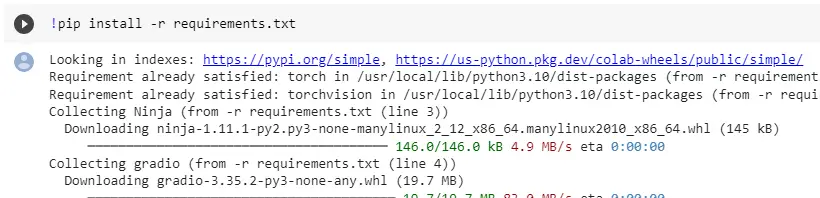
This command installs all the necessary requirements for running DragGAN.
Step 7: Download Pre-trained Weights
To download the pre-trained weights for DragGAN, run the following command:
!sh scripts/download_model.sh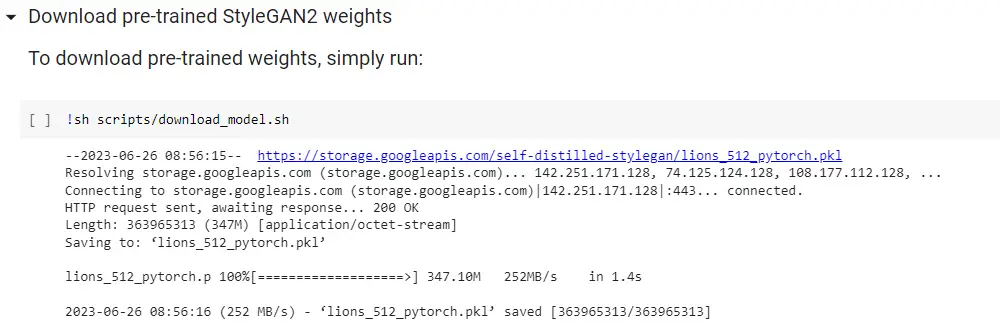
This command downloads the pre-trained model weights, which are essential for generating stylized images.
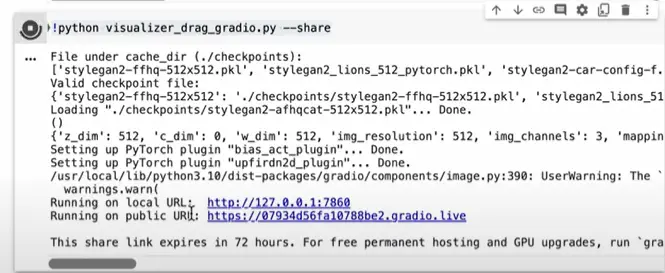
Step 8: Launch the DragGAN AI
Run the following command to start the DragGAN AI visualizer:
!python /content/DragGAN/visualizer_drag_gradio.pyThis command launches the DragGAN AI visualizer script, which allows you to interact with the model.
Step 9: Access the DragGAN AI Interface
After executing the previous step, you will see a link generated in the output. Click on the link to access the DragGAN AI interface. This interface enables you to specify the desired style using a reference image and generate stylized images based on the DragGAN model.
By following these steps, you can run DragGAN AI in Google Colab and explore its capabilities to transform images using different visual styles. Enjoy experimenting with DragGAN AI and creating unique stylized images!
How to Use DragGAN AI?
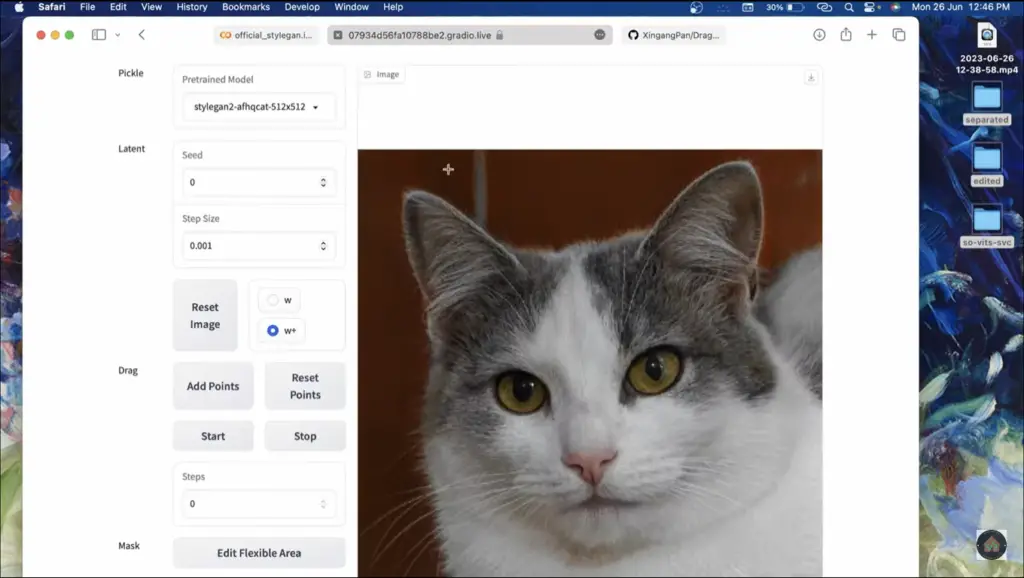
1. Interface Overview
Upon accessing the DragGAN AI demo page, you’ll notice that the interface is divided into two sections. The left section contains the settings, while the right section displays the image.

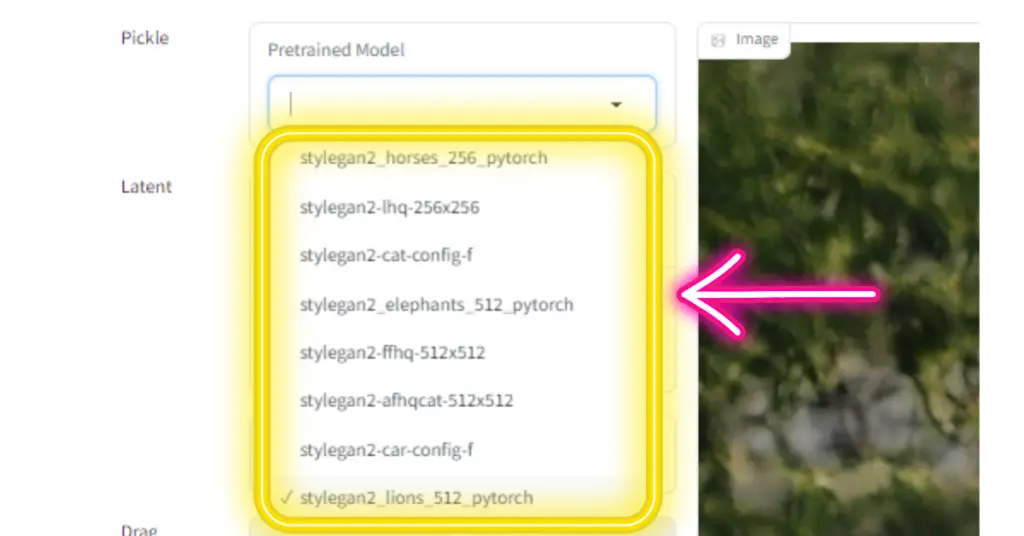
2. Select a Pre-trained Model
Start by selecting a pre-trained model from the available options in the settings section. Each model offers unique behaviors and characteristics that will influence the transformation process of the DragGAN AI tool.
3. Adjust the Seed Value
The “Seed” value determines the starting point for image generation. Adjust this value to generate an initial image that serves as the basis for the subsequent transformations. Experimenting with different seed values can yield diverse and interesting outcomes.
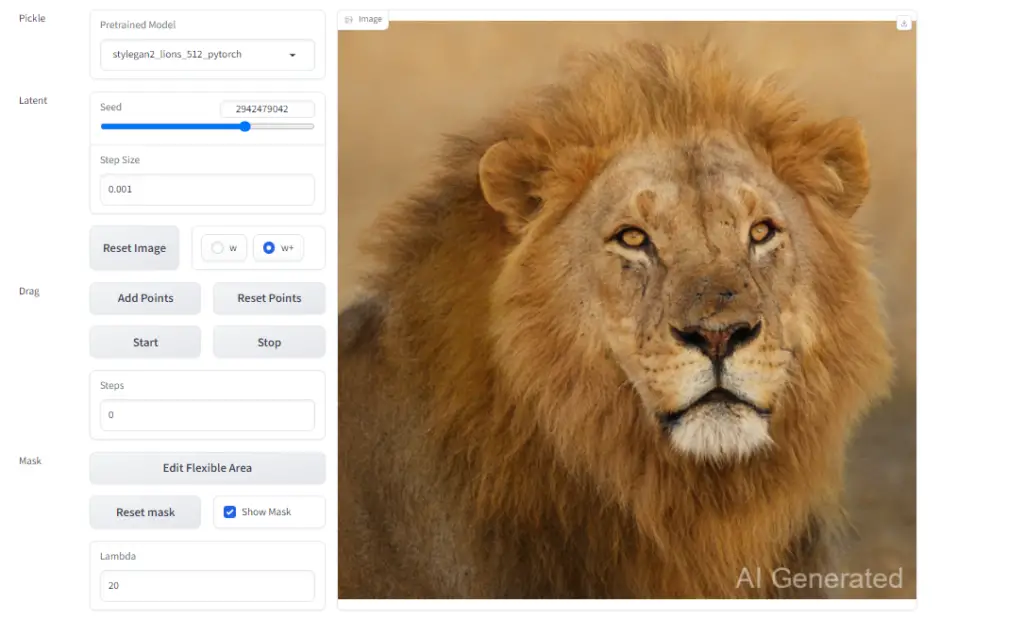
4. Add Reference Points
To guide the DragGAN in making specific changes to the image, you can add reference points. These points act as markers for indicating the desired modifications. By placing reference points strategically, you can control how the DragGAN AI model transforms the image.

5. Start the DragGAN AI Model
Once you have set the seed value and added the necessary reference points, click on the “Start” button to initiate the DragGAN AI model. The model will begin the image transformation process based on the provided inputs.
6. Observe the Image Changes
As the DragGAN AI model runs, you will observe the red reference point moving toward the blue reference point. The image displayed in the right section of the interface will update dynamically, reflecting the changes generated by the DragGAN AI model.
The visual transformation process can be fascinating to watch as the image evolves according to the movement of the reference points.