Today, I want to walk you through the process of uploading files to Maestra AI and generating transcriptions and subtitles.
Maestra AI offers an easy way to transcribe your audio and video content, and I’ll guide you step by step on how to do it.
What is Masestra AI?
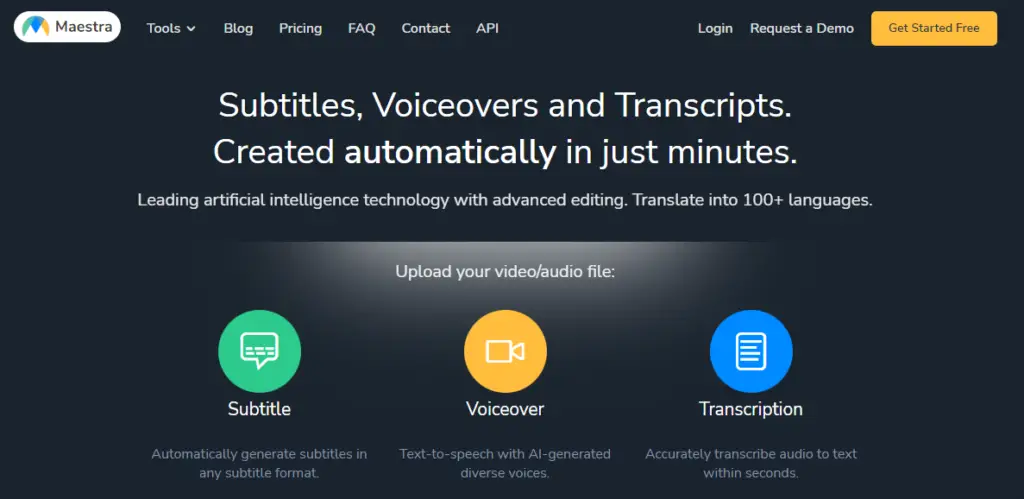
Maestra AI is a free advanced AI platform that offers the automatic creation of subtitles, voiceovers, and transcripts for your videos and audio files. You can upload your video or audio file, and Maestra AI will automatically generate subtitles in various formats, provide text-to-speech conversion with AI-generated diverse voices, and transcribe audio to text accurately within seconds.
How to use Maestra AI?
To begin, navigate to Maestra’s AI homepage.
In the upper right corner, Click on the “Get Started Free” button and create your Maestra AI account.
Creating Your Account
Once you click the “Get Started Free” button, you’ll be taken to the standard account creation page.
Here, you have two options for creating your account:
Option 1: Manual Account Creation
- Enter Your Email: The first option is to create your account manually. Simply type in your email address in the provided field.
- Choose a Password: Next, create a secure password that you’ll use to access your Maestra AI account.
Option 2: Quick Gmail Login
For those looking for a quicker and more convenient way to create their Maestra AI account, you can choose to log in with your Gmail account.
Here’s how it works:
- Click on the “Log in with Gmail” button.
- You’ll be redirected to a Google login page. If you’re not already logged into your Gmail account, you’ll be prompted to do so.
- After signing in with your Gmail credentials, Maestra AI will use your Google account information to create your Maestra account.
Logging In
With your account confirmed, you can now log in to Maestra AI. Use the email and password you provided during the manual account creation, or if you used your Gmail account, you can simply click the “Log in with Gmail” button again.
Uploading Your Files:
After logging into your Maestra account, you’ll land on the main page. In the upper right corner click on the “New Transcription.” Now, let’s explore the different options for uploading your files to Maestra AI.
Ways to Upload Files:
- Directly from Instagram: Maestra allows you to connect your Instagram account, making it easy to transcribe your IG content.
- Using Dropbox: If your files are stored on Dropbox, you can seamlessly access them through Maestra.
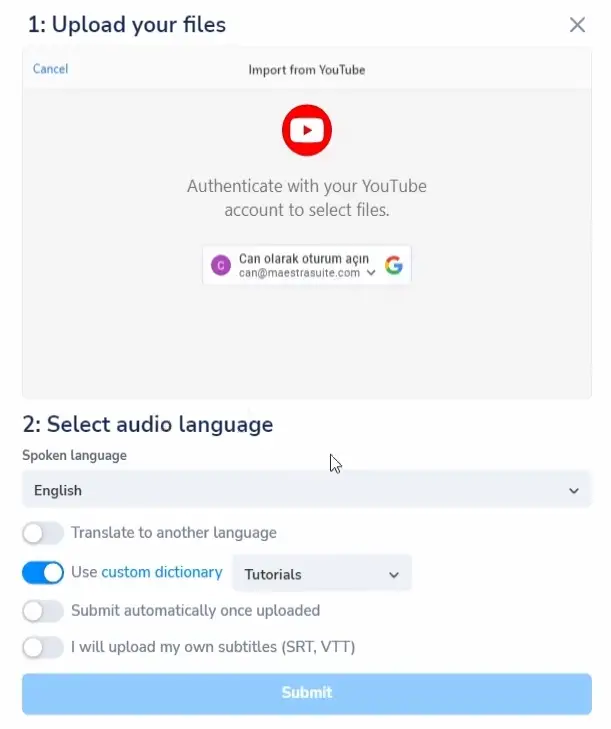
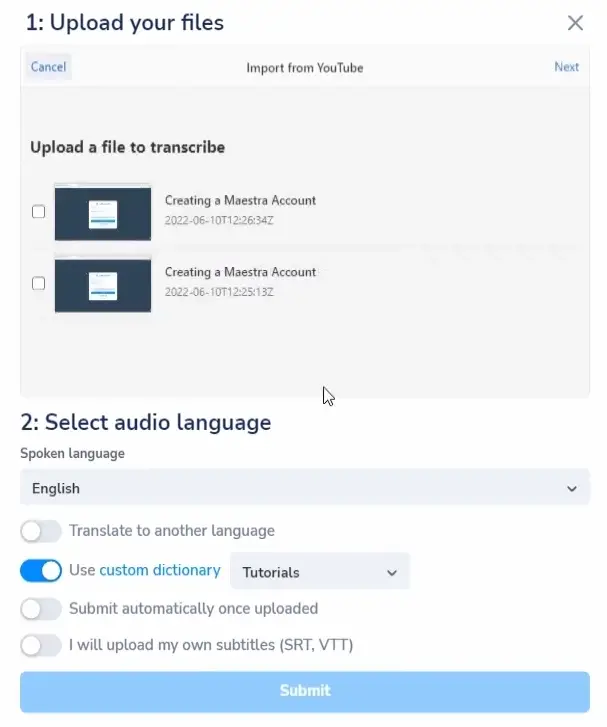
- Utilizing a YouTube Link: You can also transcribe content by providing a YouTube link.
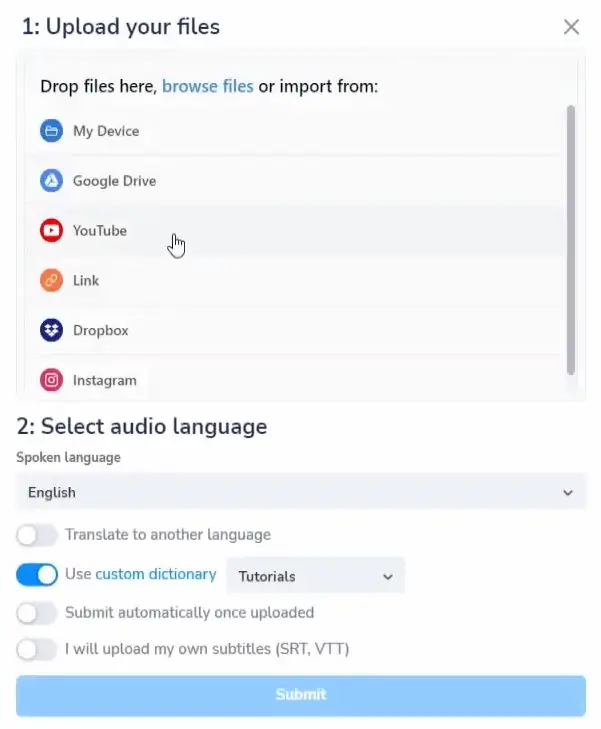
- Accessing Google Drive: Maestra is compatible with Google Drive, making it convenient to upload files from there.
- Uploading from Your Device: The most straightforward option – you can directly upload files from your computer or mobile device.
- Drag and Drop: Alternatively, you can simply drag and drop your files into Maestra, and they will be automatically uploaded.
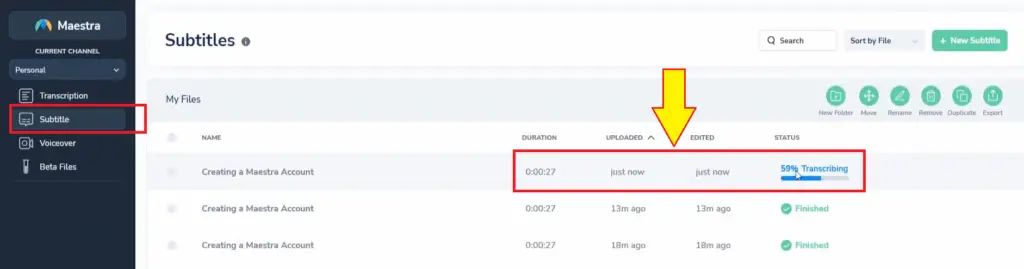
Transcription Process
Once you’ve selected your preferred method and uploaded your files, Maestra will begin the transcription process.
This may take a little time, depending on the length of your content. In our case, since we have a short video, the process will be quick.
Accessing Maestra’s Transcript Editor
Once the transcription is complete, you will see a “Submit” button. Click it, and you’ll be directed to the full-text version of your transcription.
Uploading Subtitles to Your YouTube Videos:
Step 1: Access the Subtitle Feature
At the start of your video, you’ll want to navigate to the subtitle feature on YouTube.
- Click on the “Subtitles” option while watching your video.
Step 2: Sign Into Your YouTube Account
You’ll be prompted to sign in to your YouTube account. Make sure to use the appropriate credentials.
Step 3: Allow Necessary Permissions
When you sign in, YouTube may request certain permissions. Click “Allow” to proceed.
Step 4: Choose Your Video
You’ll see a list of your uploaded videos. Simply select the video for which you’d like to add subtitles.
Translating After Uploading
Step 5: Generate Subtitles
After selecting your video, you have the option to generate subtitles. You can also add subtitles to your video after it’s uploaded.
Click “Next” to begin the process.
Step 6: Ignore Error Messages (if any)
You might encounter error messages during the process, particularly if your video is unlisted on YouTube.
Don’t worry, you can simply ignore these messages.
Step 7: Submit and Transcribe
Click “Submit,” and the system will start transcribing your video into subtitles.
Step 8: Review and Edit
Once the transcription process is complete, review your subtitles to ensure accuracy.
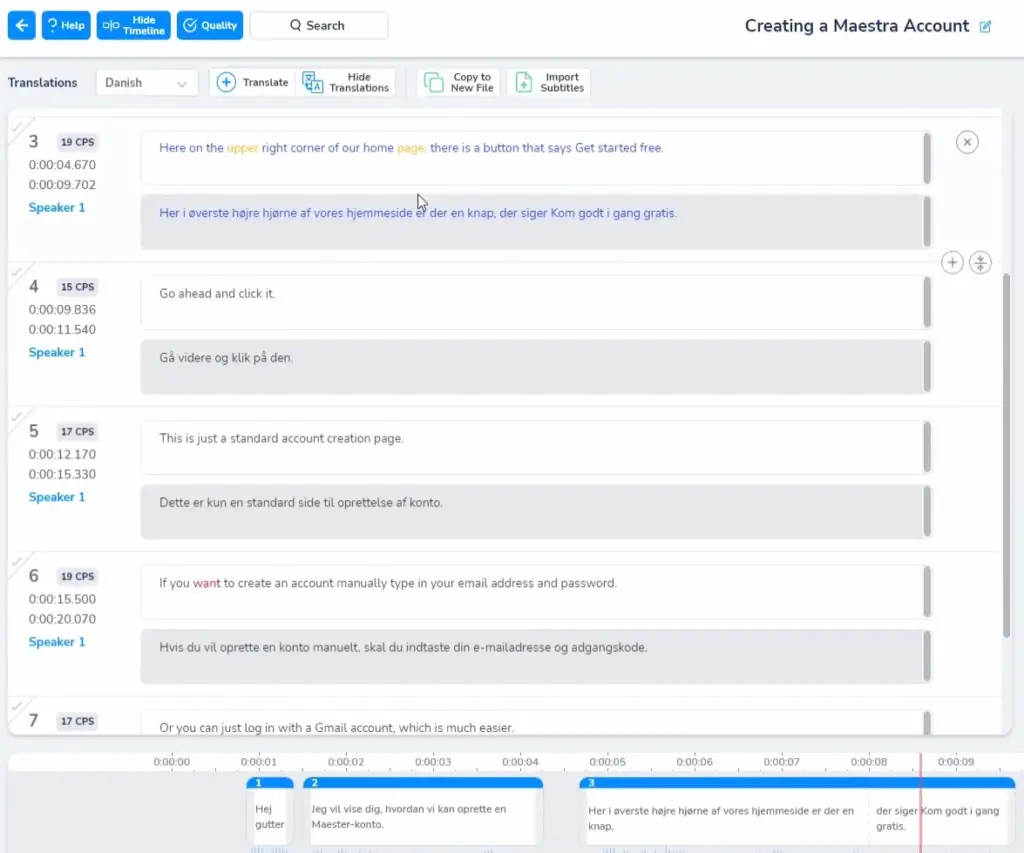
Translating Videos to More Languages
Step 9: Add Subtitles in Other Languages
If you want to make your video accessible to a global audience, you can easily add subtitles in multiple languages:
- Click on the “Translate” button.
- Choose the desired languages, such as Danish and Dutch.
Step 10: Export Subtitles
Once you’ve added subtitles in your preferred languages, it’s time to export them:
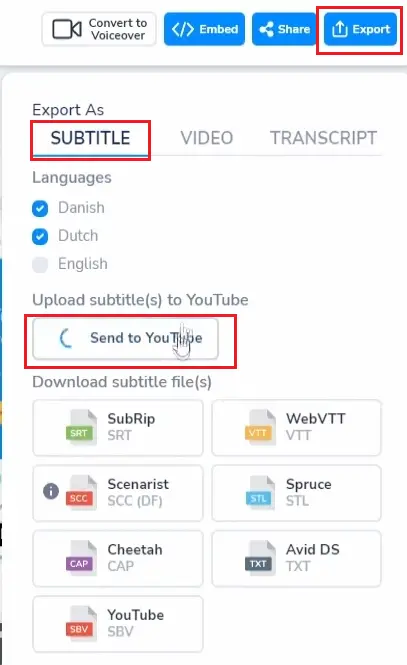
- Click on the “Export” option.
- Select the languages you want to include, such as Danish and Dutch.
- Click “Upload Subtitles to YouTube.”
Step 11: Connect Your YouTube Channel
A window will pop up asking you to select your YouTube channel. Follow the prompts to make the necessary selections.
Step 12: Send to YouTube
Finally, click “Send to YouTube” to upload your subtitles. You’ll receive a confirmation that your captions have been successfully pushed to YouTube.
Conclusion:
After following these simple steps, your video will now feature subtitles in the selected languages. Your audience can easily toggle between these subtitles while watching your content.
In just a few simple steps, you’ve made your content more inclusive and accessible to a broader audience.