MidJourney AI has finally released its highly anticipated image upscale, and we’ve taken the time to test it out.
In this article, we’ll provide you with a step-by-step guide on how to use this new upscale feature (Midjourney upscale to max). We’ll also share a detailed comparison of the results, offering insights and tips to enhance your image upscaling experience.
Let’s dive into the process of image enhancement and explore the capabilities of Mid Journey’s upscale feature.
What to Know About Midjourney AI?
- How to use Midjourney AI Image Generator?
- Tips to write best prompts for MidJourney AI
- 50+ Midjourney Tips and Tricks to Mastering Midjourney AI
- Midjourney Plans and Pricing Explained
How to upscale Midjourney Images to 4k?
To get started with the new upscale feature, follow these steps:
- Visit MidJourney’s Discord Channel.
- Generate an image that you’d like to upscale.
Once you have your image ready, you’ll notice two new upscale options: “Upscale (2x)” and “Upscale (4x).”
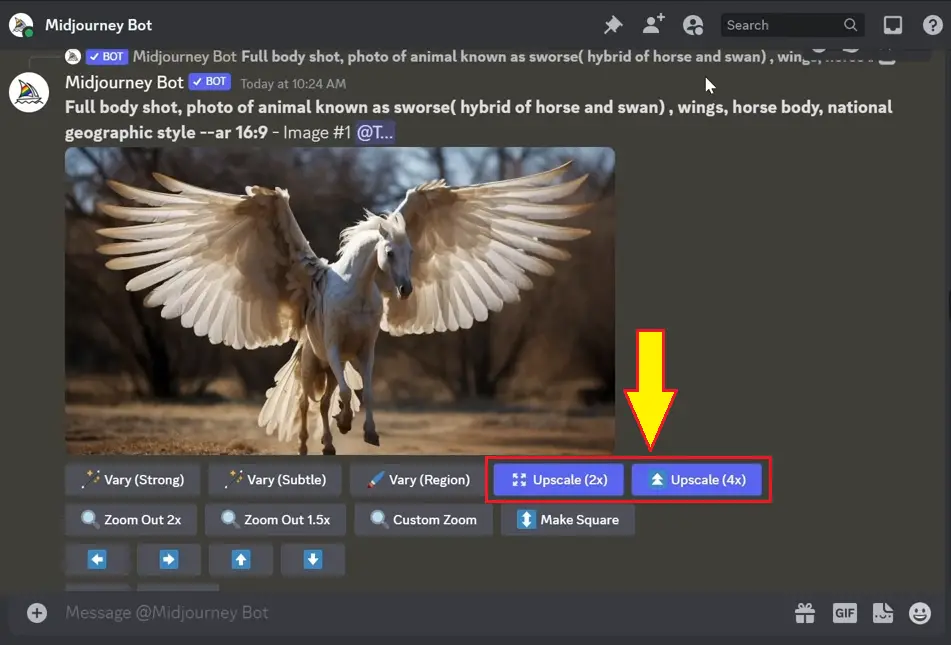
Click on these buttons to enhance your image’s resolution.
For example, if your image is originally 1456 by 816 pixels, upscaling it two times will double its dimensions to 2912 x 1632 pixels.
Upscaling it four times will quadruple its size, resulting in an image with dimensions of 5824 x 3264 pixels.
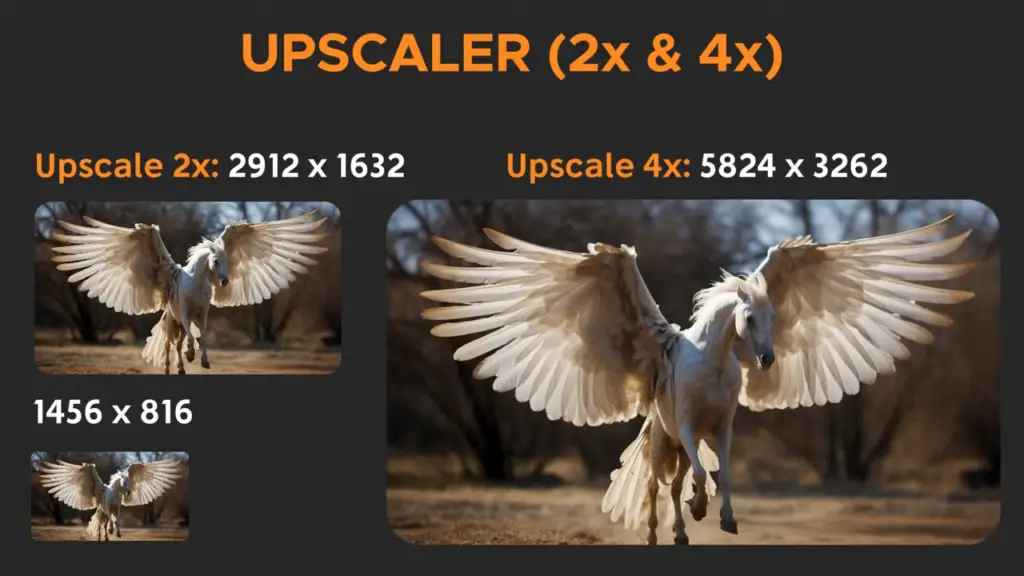
Before & After Comparison
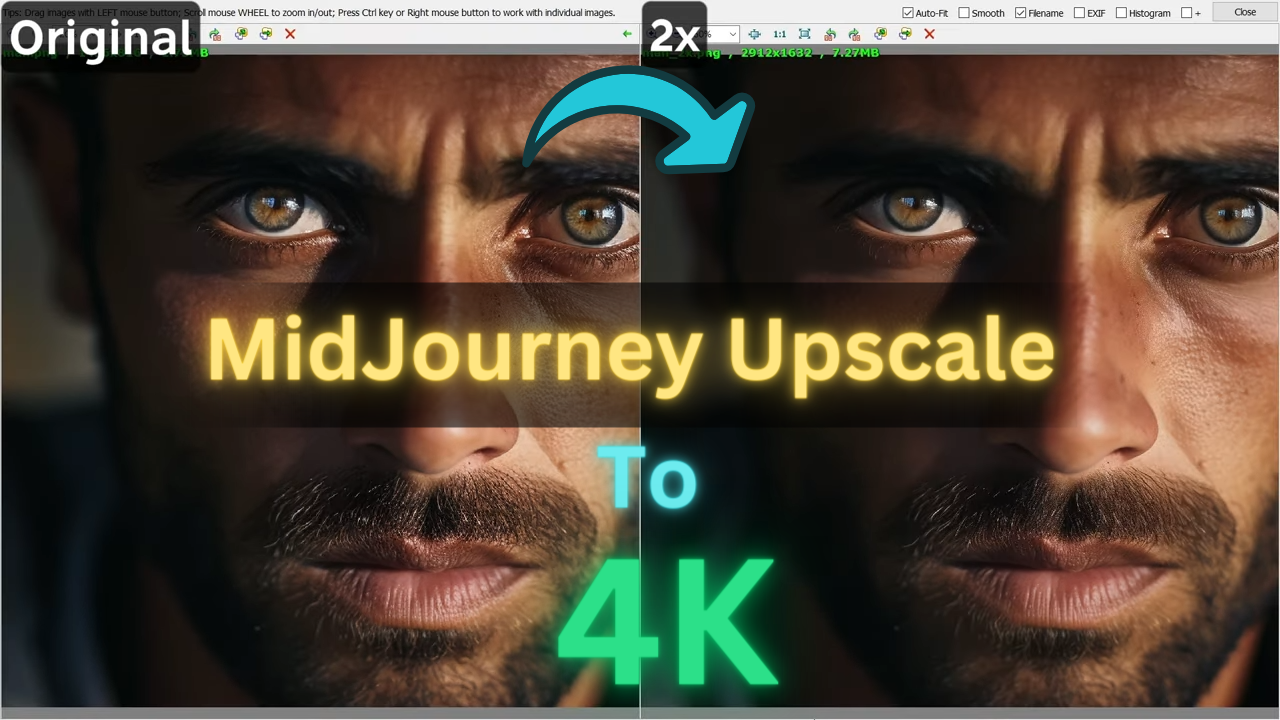
Let’s take a closer look at the difference between the original and upscaled images.
Here’s a side-by-side comparison:
- Original Image (Left): The original image is starting to show pixelation, with details becoming less clear.
- Upscaled Two Times Image (Right): The two times upscaled image maintains sharpness and preserves details effectively. Even strands of hair and facial features remain clear and vivid.
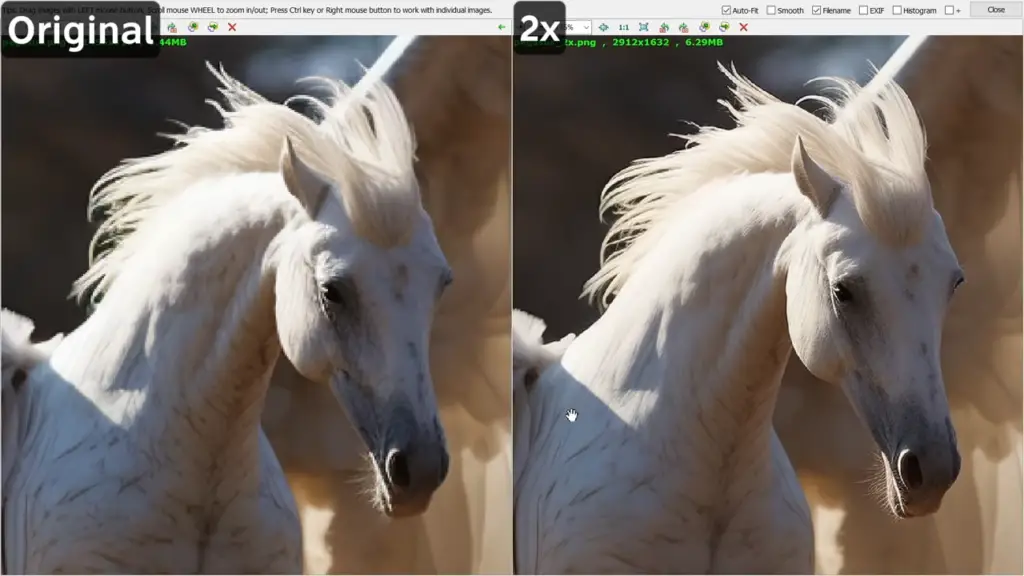
This comparison demonstrates the benefits of using the upscale feature, as the upscaled image is notably superior in terms of retaining image quality.
Midjourney’s Upscale: Blurring Images
Now, let’s explore the difference between the two-times and four-times upscaling options:
Two Times Upscaler: Provides a higher level of sharpness, ensuring details remain clear. Some pixelation may occur upon zooming in extremely closely.
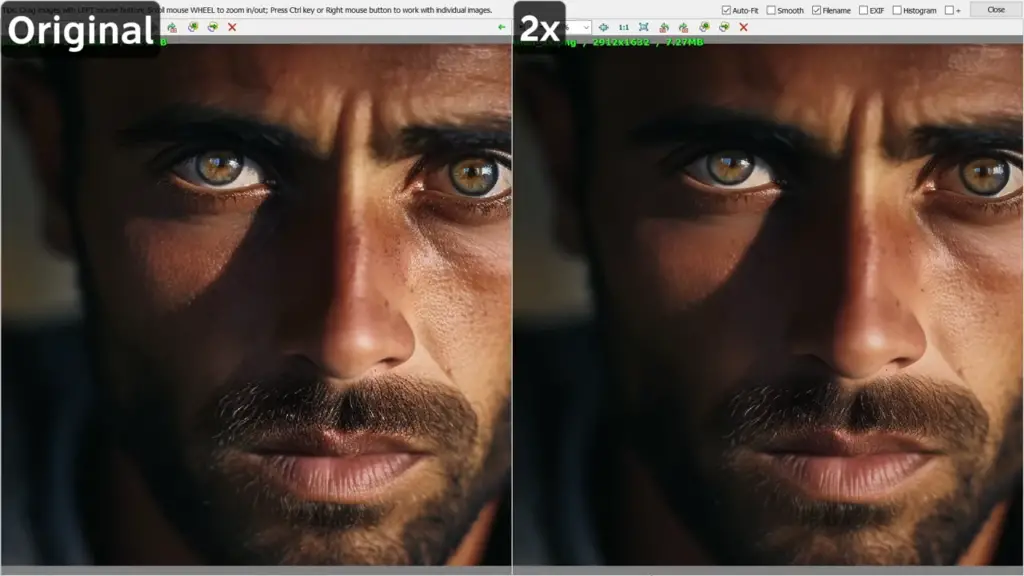
Four Times Upscaler: While still producing detailed images, it tends to introduce slight blurring or smoothing, particularly around intricate areas like the eyes and eyelashes.
This observation suggests that Mid Journey’s four-times upscale prioritizes realism by avoiding AI-generated textures but may slightly sacrifice sharpness in the process.
Consider your preferences when choosing between these two options.
Downloading Upscaled Images
To download your four times upscaled images as PNG files (instead of webp), follow these steps:
- Visit Mid Journey’s official website (midjourney.com).
- Navigate to your newly generated images.
- Scroll down to the specific upscaled image you want to save.
- Open the image, verify the resolution, and right-click to save it as a PNG file.
Upscaling Older Images
If you wish to upscale older images that lack the two-times and four-times upscale buttons, you can still achieve this by obtaining the job ID:
- Right-click on the image and select “Copy Link.”
- Paste the copied link and identify the job ID, which is typically found after the image’s name.
Once you have the job ID, proceed as follows:
Access the MidJourney upscale prompt and type “/show” in the prompt area.
Add your job ID and press Enter.
This will display the older image with the new upscale options, allowing you to enhance your older creations.
Comparing Different Styles
Now, let’s compare the results of upscaling images with different styles:
EG Mode Image: The upscale feature successfully sharpens the image and preserves details, though some intricacies, like the hands, may still appear imperfect.
Vector Logo: The upscale excels at maintaining the quality of gradients and colors in vector-based images, although fine lines may still appear slightly blurry upon close examination.
Black and White Comic Book Illustration: The upscale feature impressively preserves details, enhancing the sharpness of the image while eliminating pixelation.
Colorful Landscape: The upscale significantly improves the image’s sharpness and removes pixelation.
This demonstrates the versatility of MidJourney’s upscale feature in enhancing images of various styles and content.
Comparison to ESRGAN Upscaler
To provide a fair comparison, we’ve tested MidJourney’s upscale feature against ESRGAN, another AI upscaling tool.
Here are the key differences:
Mid Journey: While offering realistic results, it tends to add slight blurring to maintain the realism of images. This blurring may impact the sharpness of details in some areas, such as the eyes and facial features.
ESRGAN: ESRGAN maintains sharpness and clarity without introducing additional blurring, resulting in more detailed images. However, it may occasionally reveal obvious AI-generated textures.
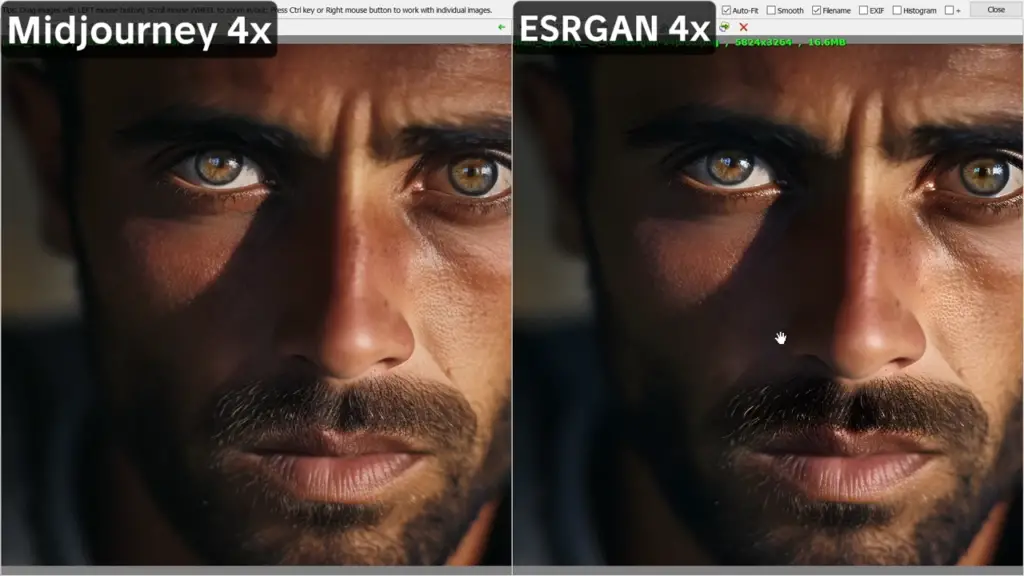
In conclusion, your choice between these upscales depends on your preferences for realism versus sharpness.
Patch Notes
Before wrapping up, let’s highlight some important points from the patch notes:
- Corrupted or Black Images: Occasionally, you may encounter corrupted or black images when using the four times upscale. This issue appears to be infrequent but is worth noting.
- Darkened Images: Upscaling images may cause them to appear slightly darker. While not a common issue, it’s essential to be aware of this potential outcome.
Conclusion:
Mid Journey’s new upscale feature provides a valuable tool for enhancing images of various styles and content. With the ability to choose between two times and four times upscaling, users have the flexibility to balance realism and sharpness based on their preferences.
The comparison with ESRGAN demonstrates that each upscaler has its strengths, catering to different image enhancement needs.
If you want a step-by-step tutorial on using this upscale software for free, be sure to check out our guide.
Related to Midjourney AI:
